如何通过Pixie实现Kubernetes云原生应用可观测?
可观测性 · 第 12 篇
来源课程笔记整理优化;插图已迁入博客静态目录。
如何通过Pixie实现Kubernetes云原生应用可观测?
一、Pixie介绍
参考网址为:https://docs.px.dev/
1.1 Pixie是什么?
Pixie is an open source observability tool for Kubernetes applications. Pixie uses eBPF to automatically capture telemetry data without the need for manual instrumentation.
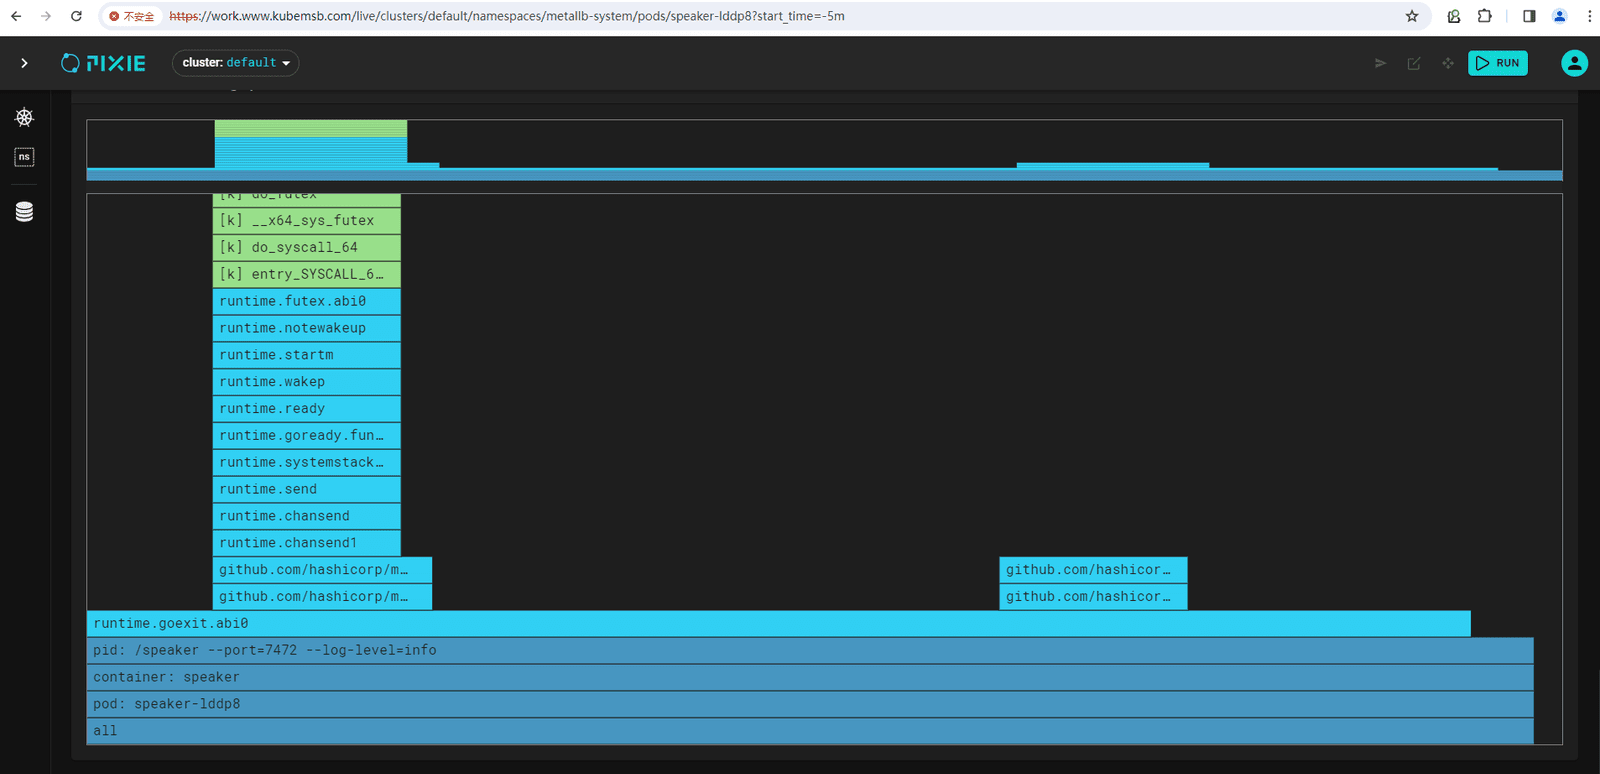
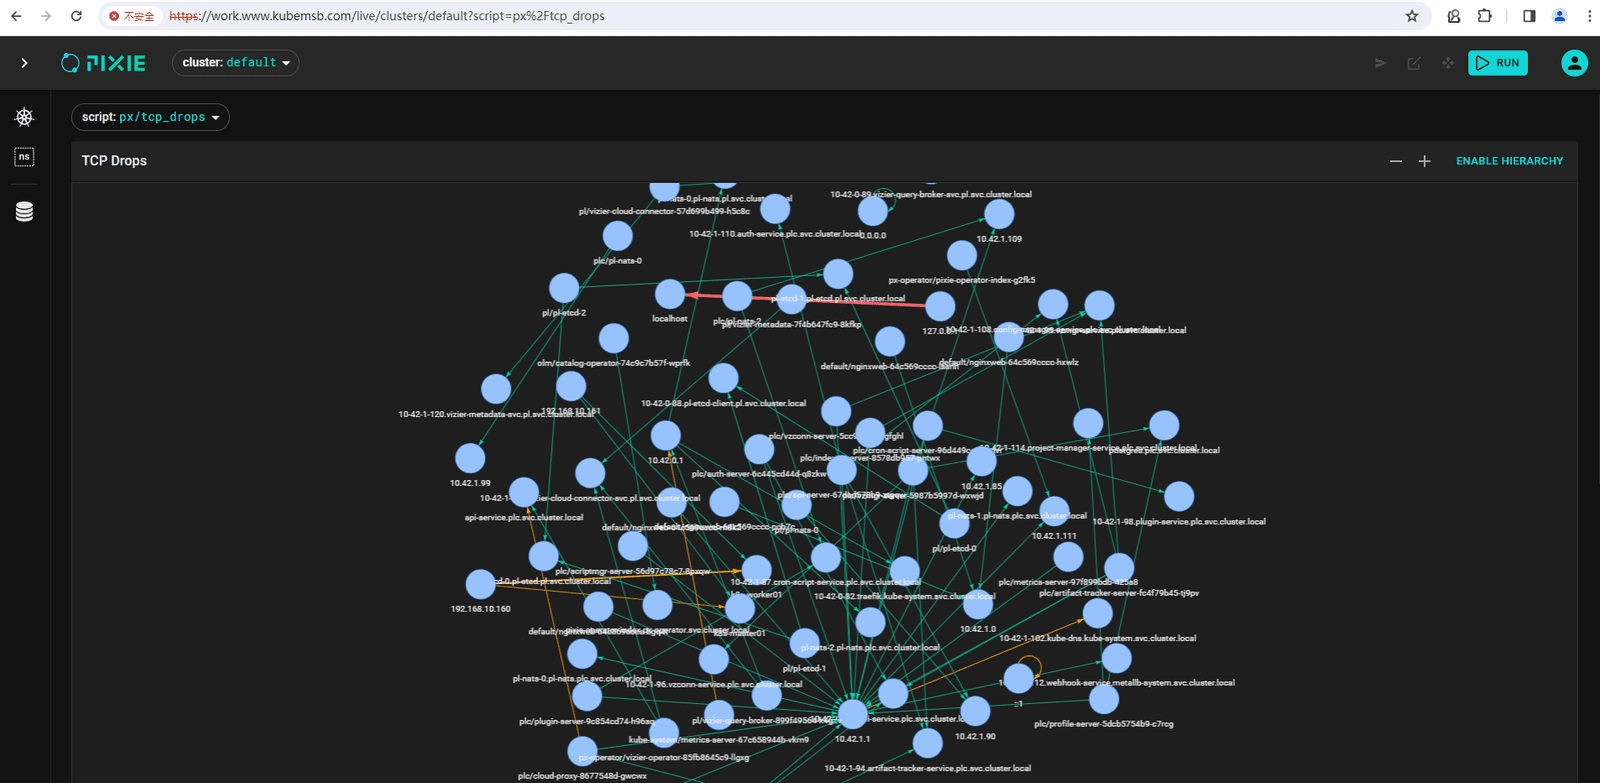
Developers can use Pixie to view the high-level state of their cluster (service maps, cluster resources, application traffic) and also drill-down into more detailed views (pod state, flame graphs, individual full body application requests).
Pixie was contributed by New Relic, Inc. to the Cloud Native Computing Foundation as a sandbox project in June 2021.
Pixie 是一个面向 Kubernetes 应用的开源可观测性工具。Pixie 使用 eBPF 自动捕获遥测数据,无需手动进行插桩。
开发者可以使用 Pixie 查看他们集群的高层状态(服务地图、集群资源、应用流量),同时还能深入查看更详细的视图(Pod 状态、火焰图、单个完整的应用请求)。
Pixie 由 New Relic, Inc. 在 2021 年 6 月贡献给 云原生计算基金会,作为一个沙箱项目。
1.2 特点
Auto-telemetry: Pixie uses eBPF to automatically collect telemetry data such as full-body requests, resource and network metrics, application profiles, and more.
In-cluster edge compute: Pixie collects, stores and queries all telemetry data locally in the cluster. Pixie uses less than 5% of cluster CPU, and in most cases less than 2%.
Scriptability: PxL, Pixie’s flexible Pythonic query language, can be used across Pixie’s UI, CLI, and client APIs. Pixie provides a set of community scripts for common use cases.
自动遥测:Pixie 使用 eBPF 自动收集遥测数据,如完整请求体、资源和网络指标、应用程序概况等,详情请见这里。
集群内边缘计算:Pixie 在集群本地收集、存储和查询所有遥测数据。Pixie 的集群 CPU 使用率不超过 5%,在大多数情况下不超过 2%。
可编程性:Pixie 的灵活的 Python 式查询语言 PxL,可以在 Pixie 的用户界面、命令行界面和客户端 API 中使用。Pixie 提供了一套社区脚本,用于常见的使用场景。
1.3 架构
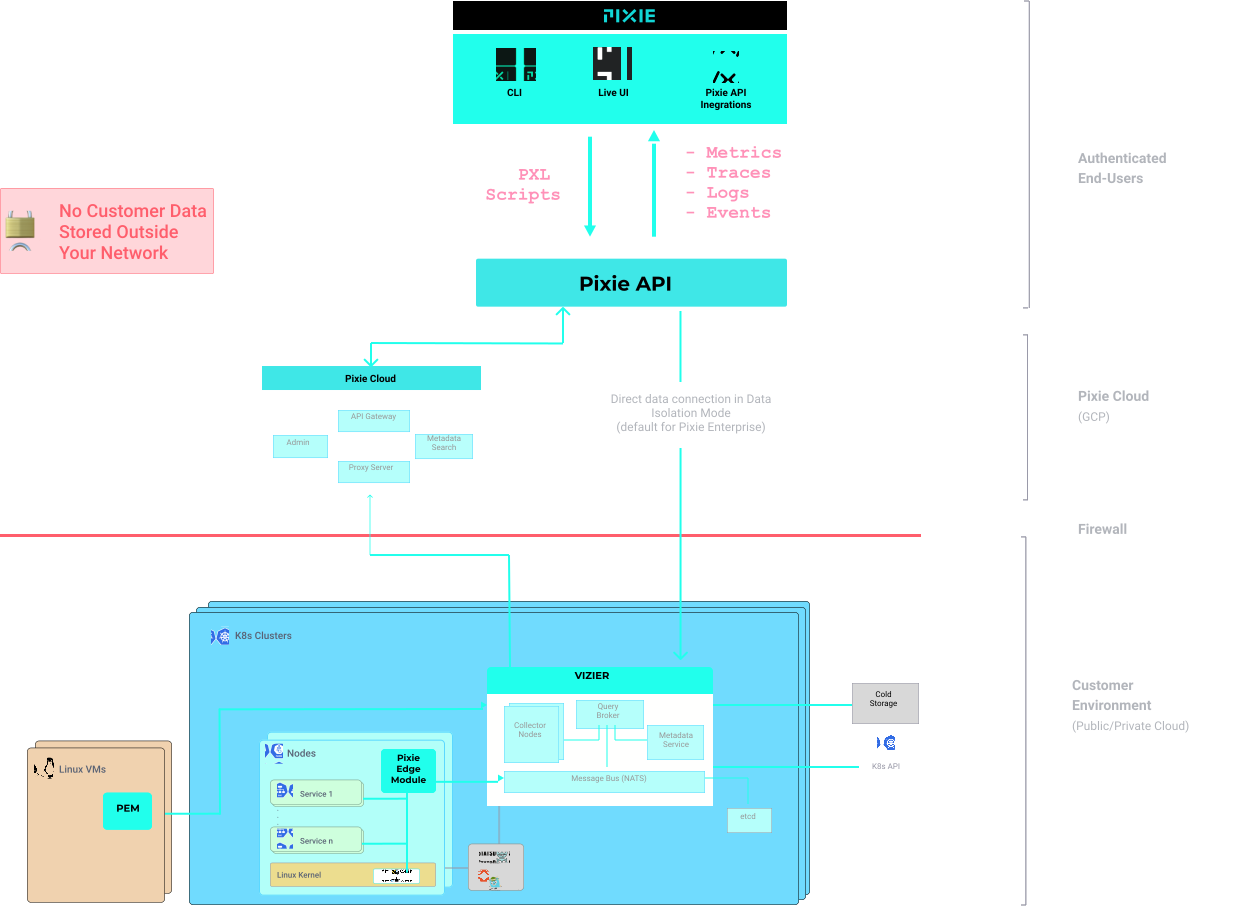
The Pixie platform consists of multiple components:
- Pixie Edge Module (PEM): Pixie's agent, installed per node. PEMs use eBPF to collect data, which is stored locally on the node.
- Vizier: Pixie’s collector, installed per cluster. Responsible for query execution and managing PEMs.
- Pixie Cloud: Used for user management, authentication, and data proxying. Can be hosted or self-hosted.
- Pixie CLI: Used to deploy Pixie. Can also be used to run queries and manage resources like API keys.
- Pixie Client API: Used for programmatic access to Pixie (e.g. integrations, Slackbots, and custom user logic requiring Pixie data as an input)
Pixie 平台由多个组件组成:
- Pixie 边缘模块 (PEM):Pixie 的代理,每个节点安装一个。PEM 使用 eBPF 收集数据,数据存储在节点本地。
- Vizier:Pixie 的收集器,每个集群安装一个。负责执行查询和管理 PEM。
- Pixie 云:用于用户管理、身份验证和数据代理。可以托管或自托管。
- Pixie 命令行界面 (CLI):用于部署 Pixie。也可用于运行查询和管理资源,如 API 密钥。
- Pixie 客户端 API:用于程序化访问 Pixie(例如,集成、Slackbots 和需要使用 Pixie 数据作为输入的自定义用户逻辑)。
二、Pixie部署
2.1 使用K3S部署K8S集群
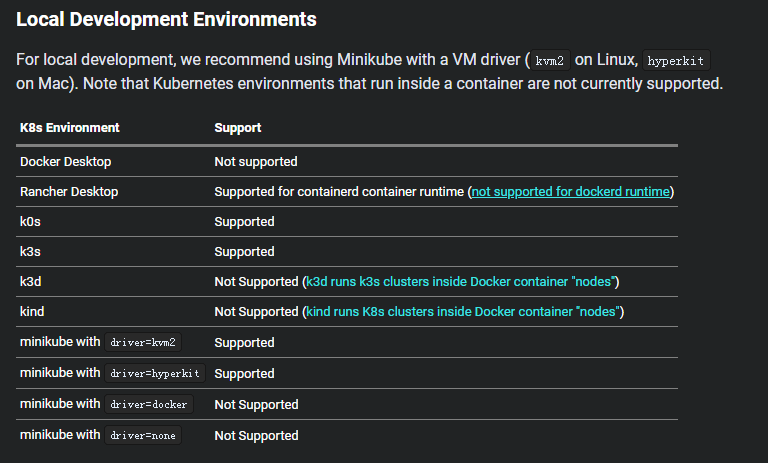
本次使用的K8S集群节点主机配置
| 主机名 | 硬件配置 | IP地址 | 备注 |
|---|---|---|---|
| k8s-master01 | CPU:8C,内存:16G,Disk:100G+ | 192.168.10.160/24 | |
| k8s-worker01 | CPU:8C, 内存:16G,Disk:100G+ | 192.168.10.161/24 | |
| nfs-server | CPU:8C,内存:8G,Disk:1024G+ | 192.168.10.163/24 |
[root@k8s-master01 ~]# curl -sfL https://get.k3s.io | INSTALL_K3S_MIRROR=CN K3S_TOKEN=smartgo sh -s - --cluster-init[root@k8s-worker01 ~]# curl -sfL https://get.k3s.io | INSTALL_K3S_MIRROR=CN K3S_TOKEN=smartgo sh -s - agent --server https://192.168.10.160:6443[root@k8s-master01 ~]# kubectl get nodes
NAME STATUS ROLES AGE VERSION
k8s-master01 Ready control-plane,etcd,master 89m v1.28.4+k3s2
k8s-worker01 Ready <none> 87m v1.28.4+k3s22.2 K8S集群持久化存储部署
2.2.1 准备硬盘
查看准备的磁盘
[root@nfsserver ~]# lsblk
NAME            MAJ:MIN RM  SIZE RO TYPE MOUNTPOINT
sda               8:0    0  100G  0 disk
├─sda1            8:1    0    1G  0 part /boot
└─sda2            8:2    0   99G  0 part
  ├─centos-root 253:0    0   50G  0 lvm  /
  ├─centos-swap 253:1    0    2G  0 lvm  [SWAP]
  └─centos-home 253:2    0   47G  0 lvm  /home
sdb               8:16   0  100G  0 disk
2.2.2 安装NFS软件
安装NFS软件,即是客户端也是服务器端
# yum -y install nfs-utils
2.2.3 NFS配置
创建挂载点
# mkdir /netshare
格式化硬盘
# mkfs.xfs /dev/sdb编辑文件系统配置文件
# vim /etc/fstab
在文件最后添加此行内容
/dev/sdb /netshare xfs defaults 0 0手动挂载全部分区
# mount -a在本地查看文件系统挂载情况
# df -h
文件系统 容量 已用 可用 已用% 挂载点
/dev/sdb 100G 33M 100G 1% /netshare添加共享目录到配置文件
# vim /etc/exports
# cat /etc/exports
/netshare *(rw,sync,no_root_squash)启动服务及设置开机自启动
# systemctl enable nfs-server
# systemctl start nfs-server2.2.4 验证
本地验证目录是否共享
# showmount -e
Export list for nfsserver:
/netshare *
在k8s master节点验证目录是否共享
# showmount -e 192.168.10.163
Export list for 192.168.10.163:
/netshare *在k8s worker01节点验证目录是否共享
# showmount -e 192.168.10.163
Export list for 192.168.10.163:
/netshare *2.2.5 部署存储动态供给
2.2.5.1 获取资源清单文件
在k8s master节点获取NFS后端存储动态供给配置资源清单文件

# for file in class.yaml deployment.yaml rbac.yaml  ; do wget https://raw.githubusercontent.com/kubernetes-incubator/external-storage/master/nfs-client/deploy/$file ; done
查看是否下载
# ls
class.yaml deployment.yaml rbac.yaml2.2.5.2 应用资源清单文件
应用rbac资源清单文件
# kubectl apply -f rbac.yaml
修改存储类名称
# vim class.yaml
# cat class.yaml
apiVersion: storage.k8s.io/v1
kind: StorageClass
metadata:
name: nfs-client
provisioner: fuseim.pri/ifs # or choose another name, must match deployment's env PROVISIONER_NAME'
parameters:
archiveOnDelete: "false"应用class(存储类)资源清单文件
# kubectl apply -f class.yaml
storageclass.storage.k8s.io/nfs-client created应用deployment资源清单文件之前修改其配置,主要配置NFS服务器及其共享的目录
# vim deployment.yaml
注意修改处内容
# vim deployment.yaml
# cat deployment.yaml
apiVersion: apps/v1
kind: Deployment
metadata:
name: nfs-client-provisioner
labels:
app: nfs-client-provisioner
# replace with namespace where provisioner is deployed
namespace: default
spec:
replicas: 1
strategy:
type: Recreate
selector:
matchLabels:
app: nfs-client-provisioner
template:
metadata:
labels:
app: nfs-client-provisioner
spec:
serviceAccountName: nfs-client-provisioner
containers:
- name: nfs-client-provisioner
image: registry.cn-beijing.aliyuncs.com/pylixm/nfs-subdir-external-provisioner:v4.0.0
volumeMounts:
- name: nfs-client-root
mountPath: /persistentvolumes
env:
- name: PROVISIONER_NAME
value: fuseim.pri/ifs
- name: NFS_SERVER
value: 192.168.10.163
- name: NFS_PATH
value: /netshare
volumes:
- name: nfs-client-root
nfs:
server: 192.168.10.163
path: /netshare应用资源清单文件
# kubectl apply -f deployment.yaml查看pod运行情况
# kubectl get pods
出现以下表示成功运行
NAME READY STATUS RESTARTS AGE
nfs-client-provisioner-8bcf6c987-7cb8p 1/1 Running 0 74s设置默认存储类
# kubectl patch storageclass nfs-client -p '{"metadata": {"annotations":{"storageclass.kubernetes.io/is-default-class":"true"}}}'# kubectl get sc
NAME PROVISIONER RECLAIMPOLICY VOLUMEBINDINGMODE ALLOWVOLUMEEXPANSION AGE
nfs-client (default) fuseim.pri/ifs Delete Immediate false 18m2.2.5.3 测试用例验证动态供给是否可用
使用测试用例测试NFS后端存储是否可用
测试用例:
# vim nginx.yaml
# cat nginx.yaml
---
apiVersion: v1
kind: Service
metadata:
  name: nginx
  labels:
    app: nginx
spec:
  ports:
  - port: 80
    name: web
  clusterIP: None
  selector:
    app: nginx
---
apiVersion: apps/v1
kind: StatefulSet
metadata:
  name: web
spec:
  selector:
    matchLabels:
      app: nginx
  serviceName: "nginx"
  replicas: 2
  template:
    metadata:
      labels:
        app: nginx
    spec:
      containers:
      - name: nginx
        image: nginx:latest
        ports:
        - containerPort: 80
          name: web
        volumeMounts:
        - name: www
          mountPath: /usr/share/nginx/html
  volumeClaimTemplates:
  - metadata:
      name: www
    spec:
      accessModes: [ "ReadWriteOnce" ]
      storageClassName: "nfs-client"
      resources:
        requests:
          storage: 1Gi
# kubectl apply -f nginx.yaml
service/nginx created
statefulset.apps/web created# kubectl get pvc
NAME STATUS VOLUME CAPACITY ACCESS MODES STORAGECLASS AGE
www-web-0 Bound pvc-57bee742-326b-4d41-b241-7f2b5dd22596 1Gi RWO nfs-client 3m19s2.3 负载均衡器metallb部署
2.3.1 metallb部署
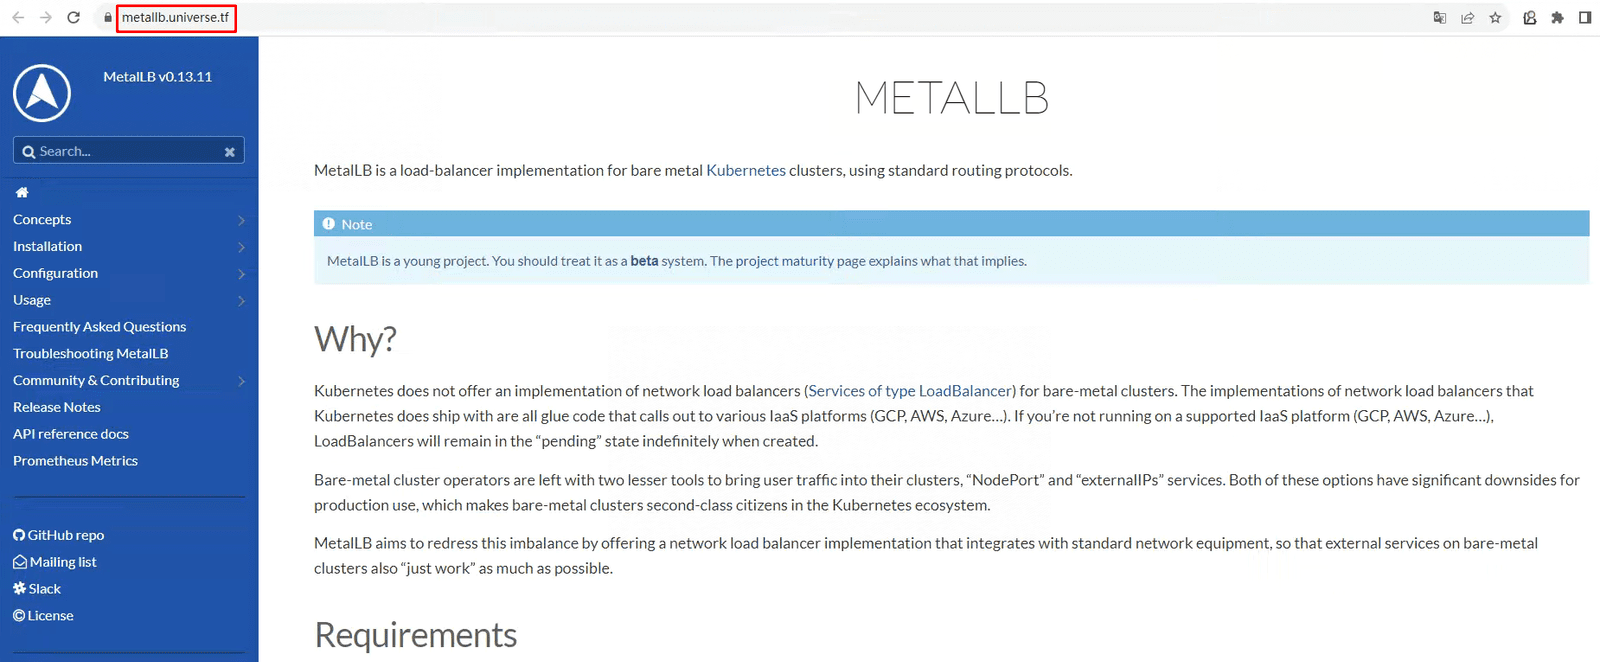
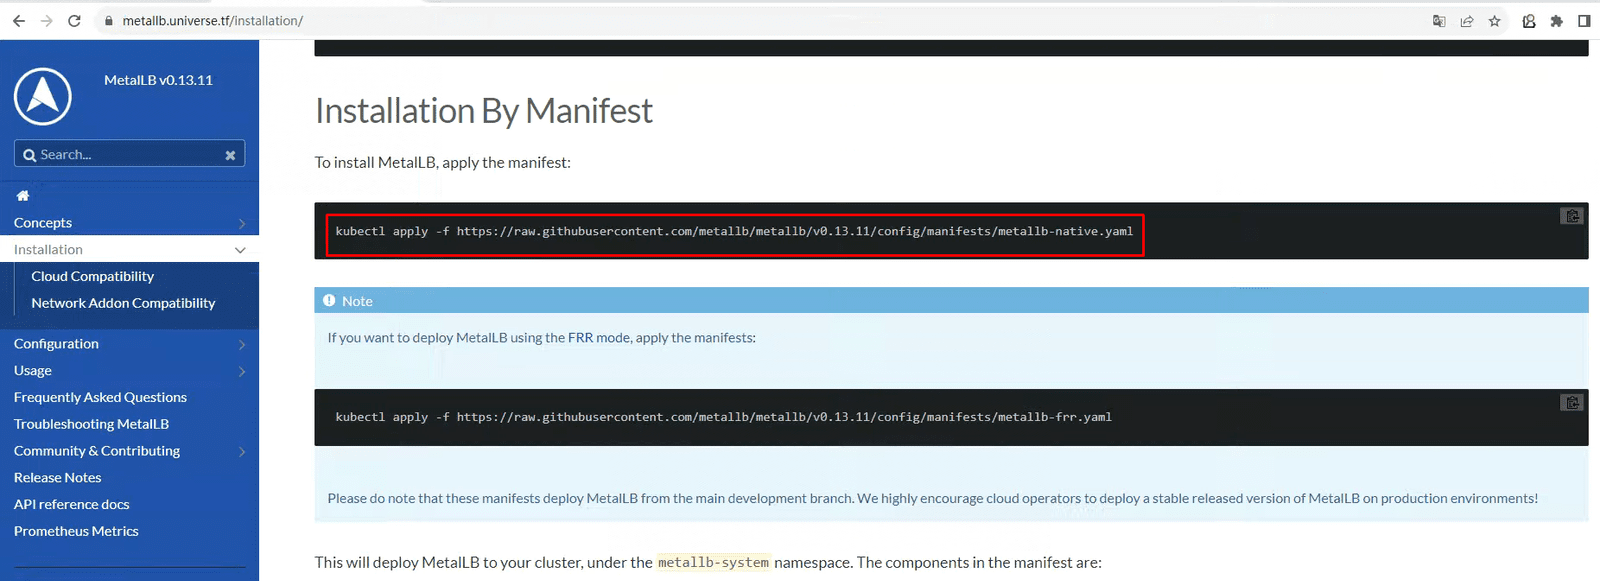
# kubectl apply -f https://raw.githubusercontent.com/metallb/metallb/v0.13.11/config/manifests/metallb-native.yaml2.3.2 IP地址池准备
# vim ippool.yaml
# cat ippool.yaml
apiVersion: metallb.io/v1beta1
kind: IPAddressPool
metadata:
  name: first-pool
  namespace: metallb-system
spec:
  addresses:
  - 192.168.10.240-192.168.10.250
# kubectl apply -f ippool.yaml2.3.3 开启二层通告
# vim l2.yaml
# cat l2.yaml
apiVersion: metallb.io/v1beta1
kind: L2Advertisement
metadata:
  name: example
  namespace: metallb-system
# kubectl apply -f l2.yaml2.4 Pixie安装
2.4.1 部署 Pixie Cloud
2.4.1.1 Clone the Pixie repo
[root@k8s-master01 ~]# git clone https://github.com/pixie-io/pixie.git
正克隆到 'pixie'...
remote: Enumerating objects: 159980, done.
remote: Counting objects: 100% (159980/159980), done.
remote: Compressing objects: 100% (35045/35045), done.
remote: Total 159980 (delta 122700), reused 159816 (delta 122630), pack-reused 0
接收对象中: 100% (159980/159980), 77.25 MiB | 16.37 MiB/s, done.
处理 delta 中: 100% (122700/122700), done.[root@k8s-master01 ~]# cd pixie/
[root@k8s-master01 pixie]# ls
ADOPTERS.md CLA.md demos go.sum OWNERS SECURITY.md tools
AUTHORS codecov.yml DEVELOPMENT.md GOVERNANCE.md pixielabs.sublime-project skaffold WORKSPACE
bazel CODE_OF_CONDUCT.md docker.properties k8s prototool.yaml src workspace.bzl
BUILD.bazel CODEOWNERS go_deps.bzl LICENSE README.md styleguide
ci CONTRIBUTING.md go.mod Makefile scripts third_party2.4.1.2 Pick a cloud release version from the tags on the repo
The following should pick the latest release for you.
[root@k8s-master01 pixie]# export LATEST_CLOUD_RELEASE=$(git tag | perl -ne 'print $1 if /release\/cloud\/v([^\-]*)$/' | sort -t '.' -k1,1nr -k2,2nr -k3,3nr | head -n 1)
[root@k8s-master01 pixie]# echo $LATEST_CLOUD_RELEASE
0.1.7
2.4.1.3 Checkout the release tag
[root@k8s-master01 pixie]# git checkout "release/cloud/v${LATEST_CLOUD_RELEASE}"
Note: checking out 'release/cloud/v0.1.7'.

You are in 'detached HEAD' state. You can look around, make experimental
changes and commit them, and you can discard any commits you make in this
state without impacting any branches by performing another checkout.

If you want to create a new branch to retain commits you create, you may
do so (now or later) by using -b with the checkout command again. Example:

  git checkout -b new_branch_name

HEAD 目前位于 95807ee... [cloud ingress] Remove slackin.* domains from certs in a safe, staged way (stage 1). (#1609)
2.4.1.4 Update the versions in the appropriate kustomization file
[root@k8s-master01 pixie]# perl -pi -e "s|newTag: latest|newTag: \"${LATEST_CLOUD_RELEASE}\"|g" k8s/cloud/public/kustomization.yaml[root@k8s-master01 pixie]# cat k8s/cloud/public/kustomization.yaml
---
apiVersion: kustomize.config.k8s.io/v1beta1
kind: Kustomization
resources:
- base/
images:
- name: gcr.io/pixie-oss/pixie-dev/cloud/api_server_image
newName: gcr.io/pixie-oss/pixie-prod/cloud/api_server_image
newTag: "0.1.7"
- name: gcr.io/pixie-oss/pixie-dev/cloud/artifact_tracker_server_image
newName: gcr.io/pixie-oss/pixie-prod/cloud/artifact_tracker_server_image
newTag: "0.1.7"
- name: gcr.io/pixie-oss/pixie-dev/cloud/auth_server_image
newName: gcr.io/pixie-oss/pixie-prod/cloud/auth_server_image
newTag: "0.1.7"
- name: gcr.io/pixie-oss/pixie-dev/cloud/config_manager_server_image
newName: gcr.io/pixie-oss/pixie-prod/cloud/config_manager_server_image
newTag: "0.1.7"
- name: gcr.io/pixie-oss/pixie-dev/cloud/proxy_server_image
newName: gcr.io/pixie-oss/pixie-prod/cloud/proxy_server_image
newTag: "0.1.7"
- name: gcr.io/pixie-oss/pixie-dev/cloud/indexer_server_image
newName: gcr.io/pixie-oss/pixie-prod/cloud/indexer_server_image
newTag: "0.1.7"
- name: gcr.io/pixie-oss/pixie-dev/cloud/metrics_server_image
newName: gcr.io/pixie-oss/pixie-prod/cloud/metrics_server_image
newTag: "0.1.7"
- name: gcr.io/pixie-oss/pixie-dev/cloud/plugin_server_image
newName: gcr.io/pixie-oss/pixie-prod/cloud/plugin_server_image
newTag: "0.1.7"
- name: gcr.io/pixie-oss/pixie-dev/cloud/profile_server_image
newName: gcr.io/pixie-oss/pixie-prod/cloud/profile_server_image
newTag: "0.1.7"
- name: gcr.io/pixie-oss/pixie-dev/cloud/project_manager_server_image
newName: gcr.io/pixie-oss/pixie-prod/cloud/project_manager_server_image
newTag: "0.1.7"
- name: gcr.io/pixie-oss/pixie-dev/cloud/scriptmgr_server_image
newName: gcr.io/pixie-oss/pixie-prod/cloud/scriptmgr_server_image
newTag: "0.1.7"
- name: gcr.io/pixie-oss/pixie-dev/cloud/cron_script_server_image
newName: gcr.io/pixie-oss/pixie-prod/cloud/cron_script_server_image
newTag: "0.1.7"
- name: gcr.io/pixie-oss/pixie-dev/cloud/vzconn_server_image
newName: gcr.io/pixie-oss/pixie-prod/cloud/vzconn_server_image
newTag: "0.1.7"
- name: gcr.io/pixie-oss/pixie-dev/cloud/vzmgr_server_image
newName: gcr.io/pixie-oss/pixie-prod/cloud/vzmgr_server_image
newTag: "0.1.7"
- name: gcr.io/pixie-oss/pixie-dev/cloud/plugin/load_db
newName: gcr.io/pixie-oss/pixie-prod/cloud/plugin/load_db
newTag: "0.1.7"2.4.1.5 Update Domain Name
(Optional) By default, the self-hosted Pixie Cloud will be accessible through
dev.withpixie.dev. If you wish to use a custom domain name, replace all occurances ofdev.withpixie.devin the following files with the domain name of your choice.
[root@k8s-master01 pixie]# cd k8s/cloud/public/base/
[root@k8s-master01 base]# ls
artifact_tracker_versions.yaml  domain_config.yaml  kustomization.yaml  plugin_db_updater_job.yaml  proxy_envoy.yaml  script_bundles_config.yaml
[root@k8s-master01 base]# vim proxy_envoy.yaml
 46                   cors:
 47                     allow_origin_string_match:
 48                     - suffix: "dev.withpixie.dev" 把此域名修改为www.kubemsb.com
 49                     allow_methods: GET, PUT, DELETE, POST, OPTIONS

[root@k8s-master01 base]# vim domain_config.yaml
---
apiVersion: v1
kind: ConfigMap
metadata:
  name: pl-domain-config
data:
  PL_DOMAIN_NAME: dev.withpixie.dev 把此域名修改为www.kubemsb.com
PASSTHROUGH_PROXY_PORT: "4444" 把4444端口删除掉[root@k8s-master01 pixie]# cd scripts/
[root@k8s-master01 scripts]# ls
access_prod_db.sh deploy_cloud_deps.sh lint.sh run_docker.sh update_tls_certs.sh
bazel_ignore_codes.sh deploy_cloud_prereqs.sh load_cloud_secrets.sh run_etcdctl.sh update_ts_protos.sh
create_cloud_secrets.sh download_heap_prof_mapped_files.sh push_ubuntu_debs_to_gcs.sh script_utils.sh
create_gke_cluster.sh gen_compilation_database.py regclient setup_dev_k8s.sh
create_release_for_dev_artifact.sh gen_compilation_database.sh run_all_bpf_tests.sh sudo_bazel_run.sh
create_release_tag.sh generate_vscode_tasks.py run_docker_bpf.sh update_go_protos.sh
[root@k8s-master01 scripts]# vim create_cloud_secrets.sh
popd || exit 1
PROXY_TLS_CERTS="$(mktemp -d)"
PROXY_CERT_FILE="${PROXY_TLS_CERTS}/server.crt"
PROXY_KEY_FILE="${PROXY_TLS_CERTS}/server.key"
mkcert \
-cert-file "${PROXY_CERT_FILE}" \
-key-file "${PROXY_KEY_FILE}" \
dev.withpixie.dev "*.dev.withpixie.dev" localhost 127.0.0.1 ::1 把此域名修改为www.kubemsb.com
kubectl create secret tls -n "${namespace}" \
cloud-proxy-tls-certs \
--cert="${PROXY_CERT_FILE}" \
--key="${PROXY_KEY_FILE}"2.4.1.6 Install mkcert
Install
mkcertfollowing the directions here. Pixie uses SSL to securely communicate between Pixie Cloud and the UI. Self-managed Pixie Cloud requires managing your own certificates.mkcertis a simple tool to create and install a local certificate authority (CA) in the system root store in order to generate locally-trusted certificates.
[root@k8s-master01 ~]# curl -JLO "https://dl.filippo.io/mkcert/latest?for=linux/amd64"
  % Total    % Received % Xferd  Average Speed   Time    Time     Time  Current
                                 Dload  Upload   Total   Spent    Left  Speed
100   123  100   123    0     0     47      0  0:00:02  0:00:02 --:--:--    47
  0     0    0     0    0     0      0      0 --:--:--  0:00:03 --:--:--     0
100 4676k  100 4676k    0     0   304k      0  0:00:15  0:00:15 --:--:-- 1083k
curl: Saved to filename 'mkcert-v1.4.4-linux-amd64'

[root@k8s-master01 ~]# ls
mkcert-v1.4.4-linux-amd64  pixie

[root@k8s-master01 ~]# chmod +x mkcert-v1.4.4-linux-amd64

[root@k8s-master01 ~]# mv mkcert-v1.4.4-linux-amd64 /usr/local/bin/mkcert
2.4.1.7 Start mkcert
This command will set up local CA and create a root certificate that Chrome and your CLI will now trust. To access Pixie Cloud from different machine that the one it was set up on, you will need to install this certificate there as well.
[root@k8s-master01 ~]# cd pixie[root@k8s-master01 pixie]# mkcert -install
Created a new local CA 💥
The local CA is now installed in the system trust store! ⚡️
The local CA is now installed in the Firefox and/or Chrome/Chromium trust store (requires browser restart)! 🦊2.4.1.8 Create the plc namespace
This namespace is not currently configurable. Several of the install scripts expect Pixie Cloud to be deployed to the
plcnamespace.
[root@k8s-master01 pixie]# kubectl create namespace plc
namespace/plc created
2.4.1.9 Create the Pixie Cloud secrets
From the top level
pixie/directory, run:
[root@k8s-master01 pixie]# ./scripts/create_cloud_secrets.sh
secret/cloud-auth-secrets created
secret/pl-hydra-secrets created
secret/pl-db-secrets created
secret/cloud-session-secrets created
/tmp/tmp.fLaGpynAHf ~/pixie
Generating RSA private key, 4096 bit long modulus
...................++
...........++
e is 65537 (0x10001)
Generating RSA private key, 4096 bit long modulus
.................................................................................................................++
.................................................................................++
e is 65537 (0x10001)
Signature ok
subject=/O=Pixie/CN=pixie.server
Getting CA Private Key
Generating RSA private key, 4096 bit long modulus
.................................................................................++
..................................................................................++
e is 65537 (0x10001)
Signature ok
subject=/O=Pixie/CN=pixie.client
Getting CA Private Key
secret/service-tls-certs created
~/pixie

Created a new certificate valid for the following names 📜
 - "www.kubemsb.com"
 - "*.www.kubemsb.com"
 - "localhost"
 - "127.0.0.1"
 - "::1"

Reminder: X.509 wildcards only go one level deep, so this won't match a.b.www.kubemsb.com ℹ️

The certificate is at "/tmp/tmp.PyPT6IeuUa/server.crt" and the key at "/tmp/tmp.PyPT6IeuUa/server.key" ✅

It will expire on 21 March 2026 🗓

secret/cloud-proxy-tls-certs created
2.4.1.10 Install kustomize
following the directions here.
[root@k8s-master01 pixie]# curl -s "https://raw.githubusercontent.com/kubernetes-sigs/kustomize/master/hack/install_kustomize.sh"  | bash
v5.3.0
kustomize installed to /root/pixie/kustomize[root@k8s-master01 pixie]# ls
ADOPTERS.md CLA.md demos go.sum Makefile scripts third_party
AUTHORS codecov.yml DEVELOPMENT.md GOVERNANCE.md OWNERS SECURITY.md tools
bazel CODE_OF_CONDUCT.md docker.properties k8s pixielabs.sublime-project skaffold WORKSPACE
BUILD.bazel CODEOWNERS go_deps.bzl kustomize prototool.yaml src workspace.bzl
ci CONTRIBUTING.md go.mod LICENSE README.md styleguide
[root@k8s-master01 pixie]# mv kustomize /usr/bin/2.4.1.11 Deploy Pixie Cloud dependencies
wait for all pods within the
plcnamespace to become ready and available before proceeding to the next step. If there is an error, you may need to retry this step. You may verify any of the images in the generated Kustomize files by following the steps in Verifying Images.
[root@k8s-master01 pixie]# kustomize build k8s/cloud_deps/base/elastic/operator | kubectl apply -f -[root@k8s-master01 pixie]# kustomize build k8s/cloud_deps/public | kubectl apply -f -2.4.1.12 Deploy Pixie Cloud
[root@k8s-master01 pixie]# kustomize build k8s/cloud/public/ | kubectl apply -f -[root@k8s-master01 pixie]# kubectl get pods -n plc2.4.1.13 Deploy Ingress Nginx
2.4.1.13.1 Prepare Ingress Nginx YAML File
[root@k8s-master01 ~]# wget https://raw.githubusercontent.com/kubernetes/ingress-nginx/controller-v1.9.5/deploy/static/provider/cloud/deploy.yaml[root@k8s-master01 ~]# vim deploy.yaml
......
---
apiVersion: v1
kind: Service
metadata:
labels:
app.kubernetes.io/component: controller
app.kubernetes.io/instance: ingress-nginx
app.kubernetes.io/name: ingress-nginx
app.kubernetes.io/part-of: ingress-nginx
app.kubernetes.io/version: 1.9.5
name: ingress-nginx-controller
namespace: ingress-nginx
spec:
externalTrafficPolicy: Cluster 把此处Local修改Cluster
ipFamilies:
- IPv4
ipFamilyPolicy: SingleStack
ports:
- appProtocol: http
name: http
port: 80
protocol: TCP
targetPort: http
- appProtocol: https
name: https
port: 443
protocol: TCP
targetPort: https
selector:
app.kubernetes.io/component: controller
app.kubernetes.io/instance: ingress-nginx
app.kubernetes.io/name: ingress-nginx
type: LoadBalancer[root@k8s-master01 ~]# kubectl apply -f deploy.yaml[root@k8s-master01 ~]# kubectl get pods -n ingress-nginx
NAME READY STATUS RESTARTS AGE
ingress-nginx-admission-create-dk6fl 0/1 Completed 0 31s
ingress-nginx-admission-patch-lxt65 0/1 Completed 2 31s
ingress-nginx-controller-5d974c544-zc9jn 1/1 Running 0 31s[root@k8s-master01 ~]# kubectl get svc -n ingress-nginx
NAME TYPE CLUSTER-IP EXTERNAL-IP PORT(S) AGE
ingress-nginx-controller LoadBalancer 10.43.47.137 192.168.10.240 80:30629/TCP,443:30177/TCP 40s
ingress-nginx-controller-admission ClusterIP 10.43.20.115 <none> 443/TCP 40s[root@k8s-master01 ~]# kubectl get ingressclass
NAME CONTROLLER PARAMETERS AGE
nginx k8s.io/ingress-nginx <none> 2m2.4.1.13.2 Setup Ingress Object
[root@k8s-master01 ~]# cd pixie/
[root@k8s-master01 pixie]# cd k8s/cloud/overlays/exposed_services_nginx/
[root@k8s-master01 exposed_services_nginx]# ls
cloud_ingress_grpcs.yaml cloud_ingress_https.yaml[root@k8s-master01 exposed_services_nginx]# vim cloud_ingress_grpcs.yaml
[root@k8s-master01 exposed_services_nginx]# cat cloud_ingress_grpcs.yaml
## Replace all occurrences of pixie.example.com with the custom domain name you wish to use
---
apiVersion: networking.k8s.io/v1
kind: Ingress
metadata:
name: cloud-ingress-grpcs
namespace: plc
annotations:
nginx.ingress.kubernetes.io/backend-protocol: "GRPCS"
nginx.ingress.kubernetes.io/use-regex: 'true'
spec:
ingressClassName: nginx
tls:
- hosts:
- www.kubemsb.com 设置域名
- work.www.kubemsb.com 设置域名
secretName: cloud-proxy-tls-certs
rules:
- host: www.kubemsb.com 设置域名
http:
paths:
- path: /px.services.(.*)
pathType: Prefix
backend:
service:
name: vzconn-service
port:
number: 51600
- path: /px.cloudapi.(.*)
pathType: Prefix
backend:
service:
name: api-service
port:
number: 51200
- path: /px.api.(.*)
pathType: Prefix
backend:
service:
name: cloud-proxy-service
port:
number: 4444
- host: work.www.kubemsb.com 设置域名
http:
paths:
- path: /px.services.(.*)
pathType: Prefix
backend:
service:
name: vzconn-service
port:
number: 51600
- path: /px.cloudapi.(.*)
pathType: Prefix
backend:
service:
name: api-service
port:
number: 51200
- path: /px.api.(.*)
pathType: Prefix
backend:
service:
name: cloud-proxy-service
port:
number: 4444[root@k8s-master01 exposed_services_nginx]# vim cloud_ingress_https.yaml
[root@k8s-master01 exposed_services_nginx]# cat cloud_ingress_https.yaml
## Replace all occurrences of pixie.example.com with the custom domain name you wish to use
---
apiVersion: networking.k8s.io/v1
kind: Ingress
metadata:
name: cloud-ingress-https
namespace: plc
annotations:
nginx.ingress.kubernetes.io/backend-protocol: "HTTPS"
spec:
ingressClassName: nginx
tls:
- hosts:
- www.kubemsb.com 设置域名
- work.www.kubemsb.com 设置域名
secretName: cloud-proxy-tls-certs
rules:
- host: www.kubemsb.com 设置域名
http:
paths:
- path: /
pathType: Prefix
backend:
service:
name: cloud-proxy-service
port:
number: 443
- host: work.www.kubemsb.com 设置域名
http:
paths:
- path: /
pathType: Prefix
backend:
service:
name: cloud-proxy-service
port:
number: 4432.4.1.13.3 Apply Ingress Object File
[root@k8s-master01 exposed_services_nginx]# kubectl apply -f cloud_ingress_grpcs.yaml
Warning: path /px.api.(.*) cannot be used with pathType Prefix
ingress.networking.k8s.io/cloud-ingress-grpcs created[root@k8s-master01 exposed_services_nginx]# kubectl apply -f cloud_ingress_https.yaml
ingress.networking.k8s.io/cloud-ingress-https created[root@k8s-master01 exposed_services_nginx]# kubectl get ingress -n plc
NAME CLASS HOSTS ADDRESS PORTS AGE
cloud-ingress-grpcs nginx www.kubemsb.com,work.www.kubemsb.com 192.168.10.240 80, 443 63s
cloud-ingress-https nginx www.kubemsb.com,work.www.kubemsb.com 80, 443 10s[root@k8s-master01 exposed_services_nginx]# kubectl describe ingress cloud-ingress-grpcs -n plc
Name: cloud-ingress-grpcs
Labels: <none>
Namespace: plc
Address: 192.168.10.240
Ingress Class: nginx
Default backend: <default>
TLS:
cloud-proxy-tls-certs terminates www.kubemsb.com,work.www.kubemsb.com
Rules:
Host Path Backends
---- ---- --------
www.kubemsb.com
/px.services.(.*) vzconn-service:51600 (10.42.0.29:51600)
/px.cloudapi.(.*) api-service:51200 (10.42.0.15:51200)
/px.api.(.*) cloud-proxy-service:4444 (10.42.0.21:56004)
work.www.kubemsb.com
/px.services.(.*) vzconn-service:51600 (10.42.0.29:51600)
/px.cloudapi.(.*) api-service:51200 (10.42.0.15:51200)
/px.api.(.*) cloud-proxy-service:4444 (10.42.0.21:56004)
Annotations: nginx.ingress.kubernetes.io/backend-protocol: GRPCS
nginx.ingress.kubernetes.io/use-regex: true
Events:
Type Reason Age From Message
---- ------ ---- ---- -------
Normal Sync 48s (x2 over 95s) nginx-ingress-controller Scheduled for sync[root@k8s-master01 exposed_services_nginx]# kubectl describe ingress cloud-ingress-https -n plc
Name: cloud-ingress-https
Labels: <none>
Namespace: plc
Address: 192.168.10.240
Ingress Class: nginx
Default backend: <default>
TLS:
cloud-proxy-tls-certs terminates www.kubemsb.com,work.www.kubemsb.com
Rules:
Host Path Backends
---- ---- --------
www.kubemsb.com
/ cloud-proxy-service:443 (10.42.0.21:56000)
work.www.kubemsb.com
/ cloud-proxy-service:443 (10.42.0.21:56000)
Annotations: nginx.ingress.kubernetes.io/backend-protocol: HTTPS
Events:
Type Reason Age From Message
---- ------ ---- ---- -------
Normal Sync 5s (x2 over 59s) nginx-ingress-controller Scheduled for sync2.4.1.14 Pixie Dashboard访问
chrome浏览器一定要兼容非安全网络访问。
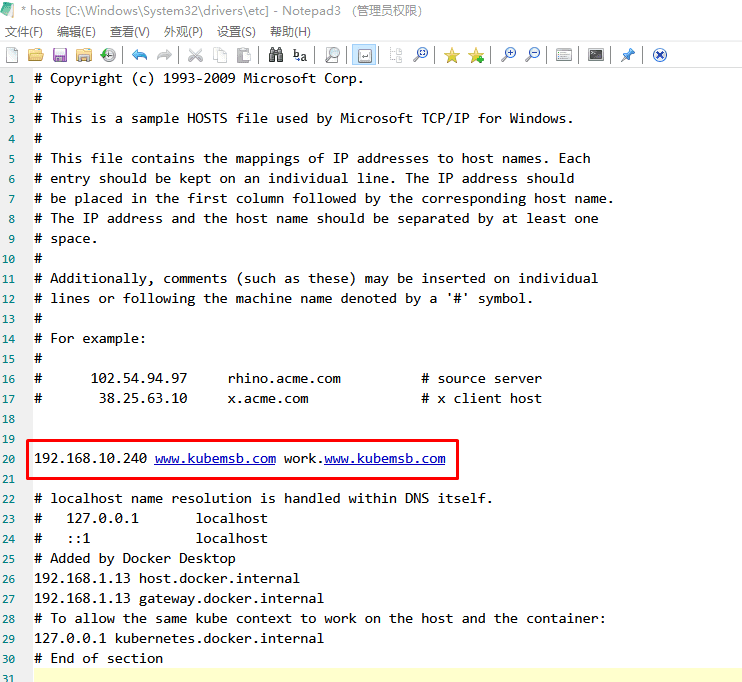
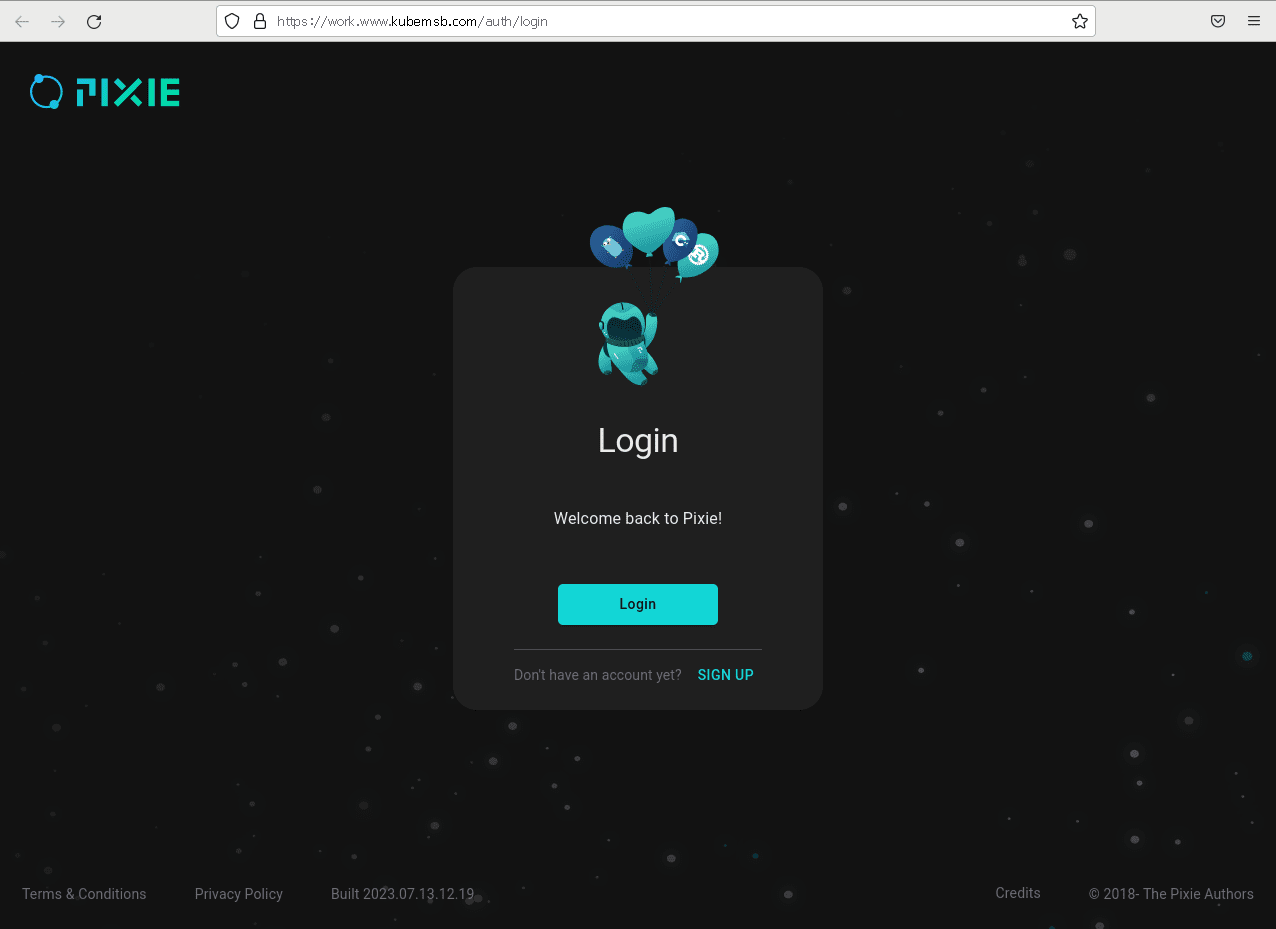
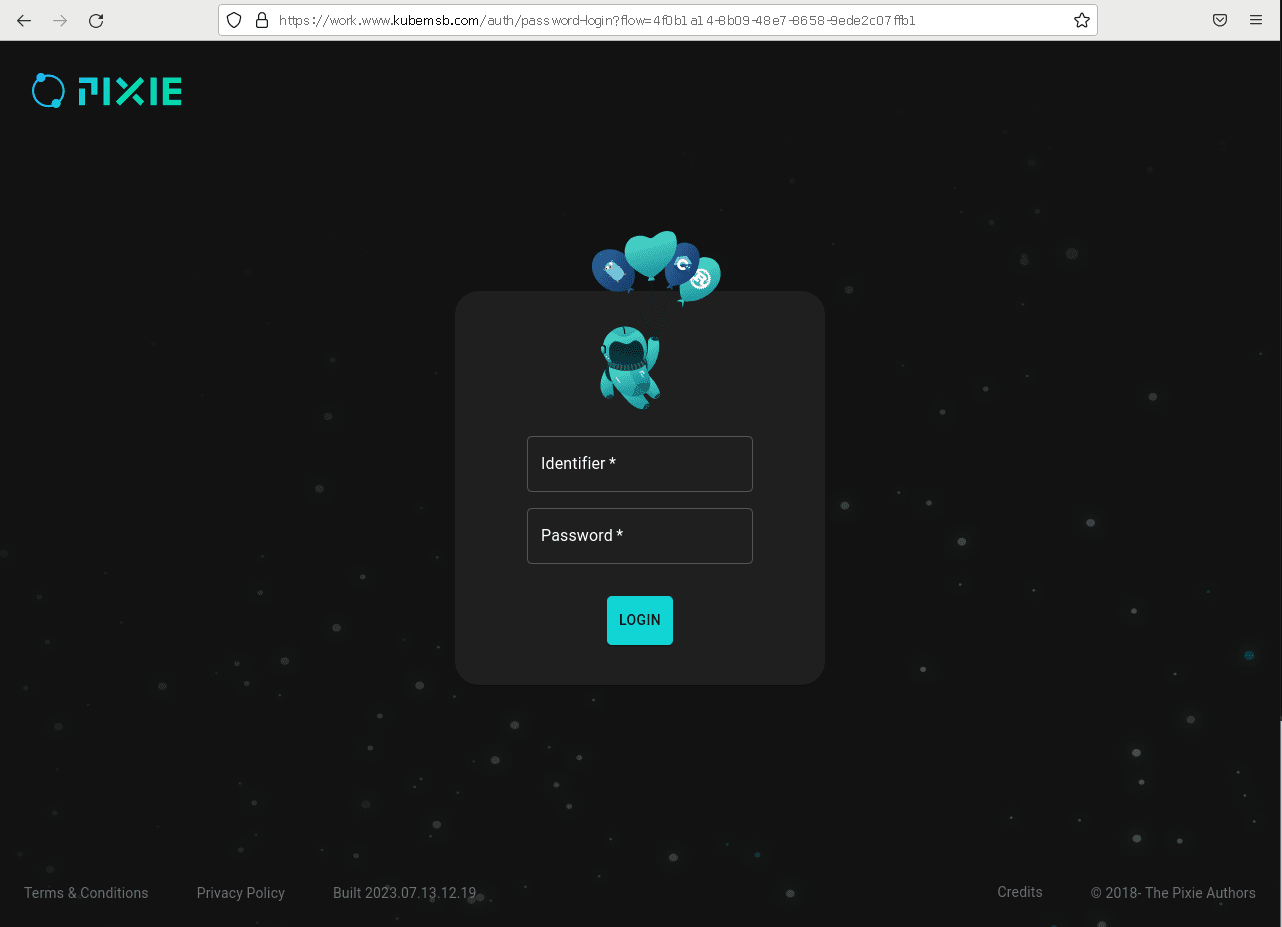
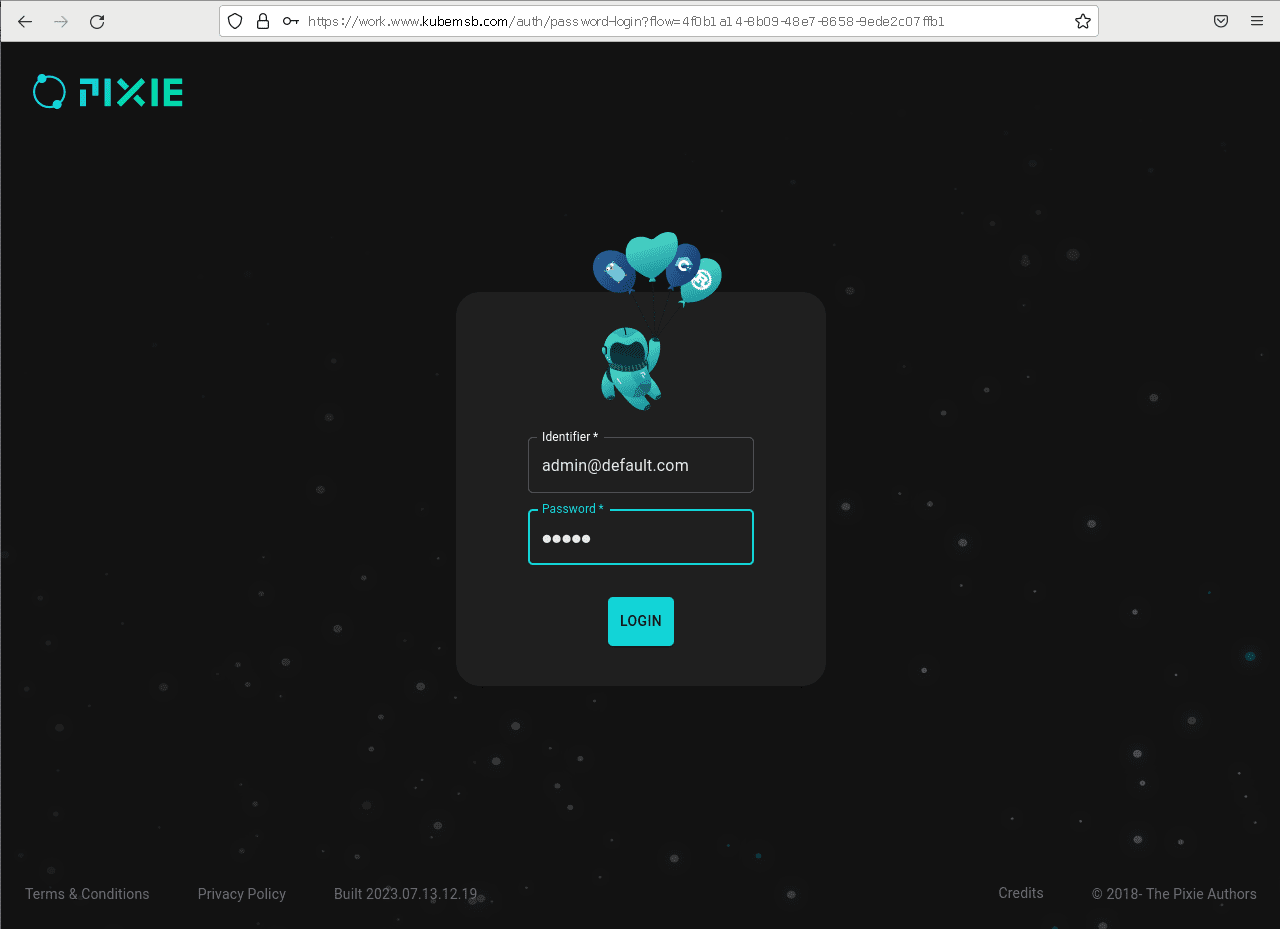
用户名:admin@default.com 密码:admin
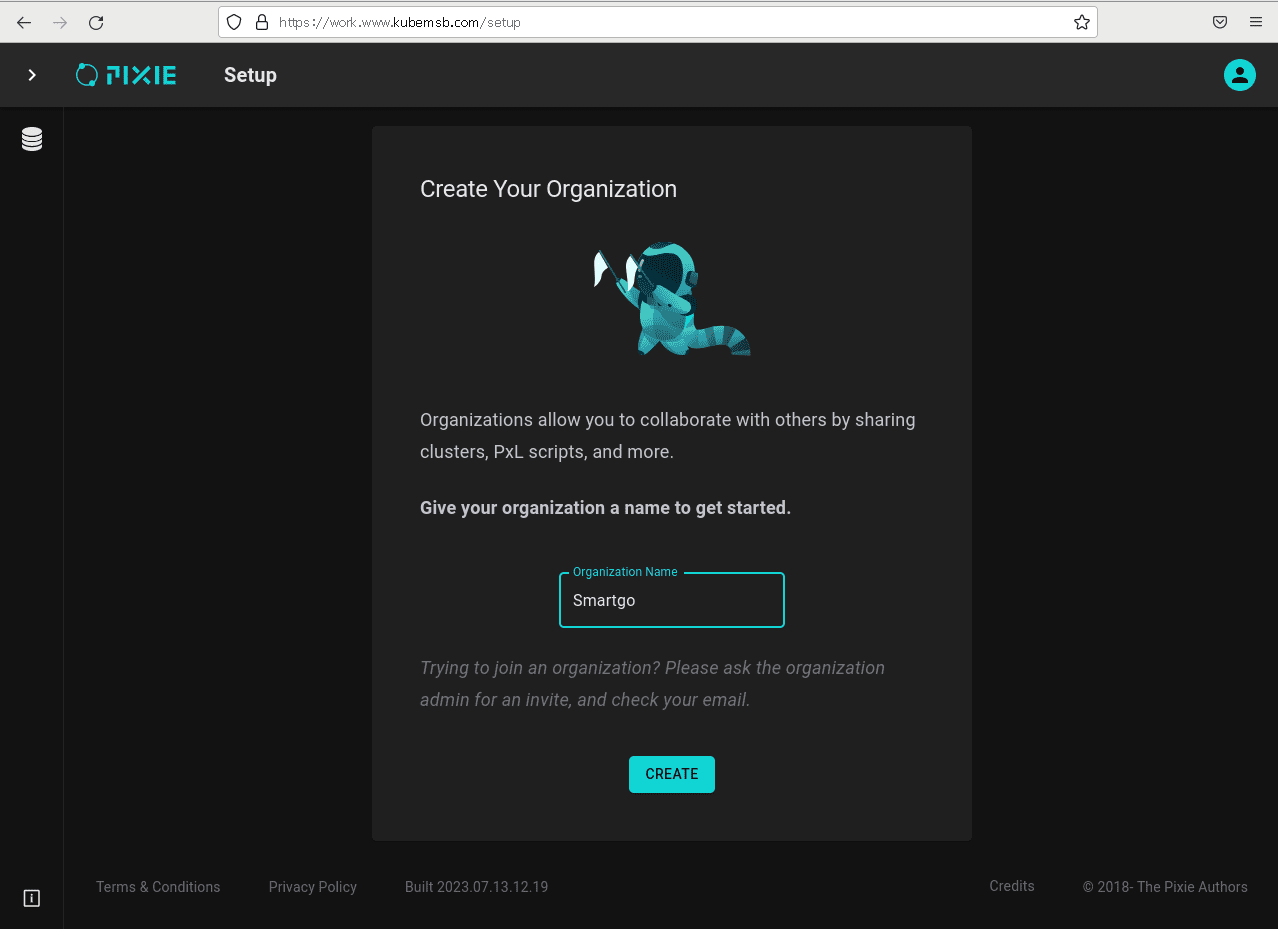
2.4.2 安装 Pixie CLI
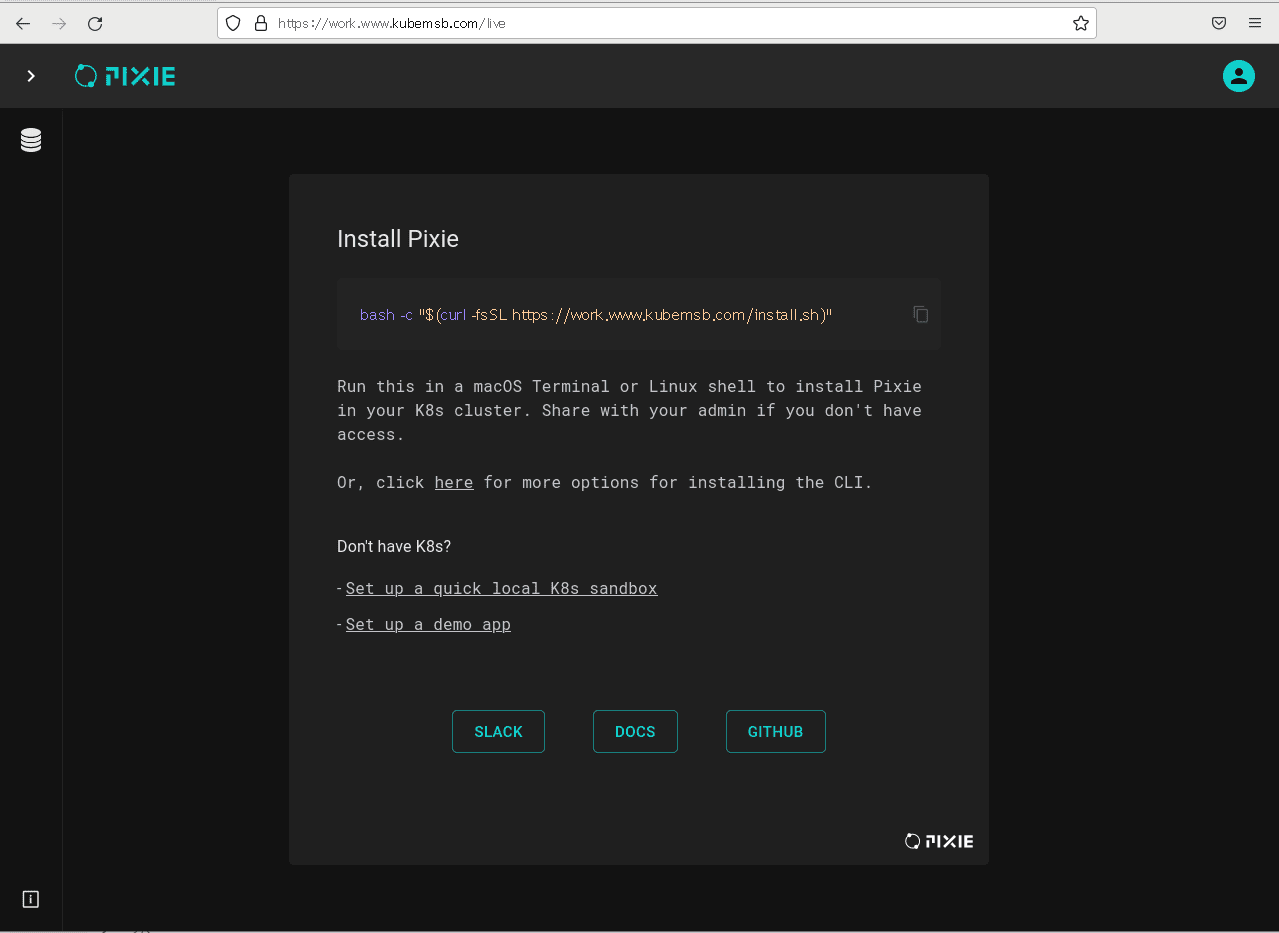
[root@k8s-master01 ~]# yum -y install perl-Digest-SHA[root@k8s-master01 ~]# bash -c "$(curl -fsSL https://work.www.kubemsb.com/install.sh)"输出内容:
___ _ _
| _ \(_)__ __(_) ___
| _/| |\ \ /| |/ -_)
|_| |_|/_\_\|_|\___|
==> Info:
Pixie gives engineers access to no-instrumentation, streaming &
unsampled auto-telemetry to debug performance issues in real-time,
More information at: https://www.px.dev.
This command will install the Pixie CLI (px) in a location selected
by you, and performs authentication with Pixie's control plane.
After installation of the CLI you can easily manage Pixie
installations on your K8s clusters and execute scripts to collect
telemetry from your clusters using Pixie.
Docs:
https://docs.px.dev
Github:
https://github.com/pixie-io/pixie
==> Terms and Conditions https://www.px.dev/terms
I have read and accepted the Terms & Conditions [y/n]: y
==> Installing PX CLI:
Install Path [/usr/local/bin]:
==> Next steps:
- PX CLI has been installed to: /usr/local/bin. Make sure this directory is in your PATH.
- First run px auth login with `PX_CLOUD_ADDR` set to authenticate.
- Run px deploy to deploy Pixie on K8s.
- Run px help for more commands.
- Further documentation:
docs.px.dev2.4.3 部署 Pixie
[root@k8s-master01 ~]# kubectl edit configmap coredns -n kube-system
......
apiVersion: v1
data:
  Corefile: |
    .:53 {
        errors
        health
        ready
        kubernetes cluster.local in-addr.arpa ip6.arpa {
          pods insecure
          fallthrough in-addr.arpa ip6.arpa
        }
        hosts /etc/coredns/NodeHosts {
          ttl 60
          reload 15s
          fallthrough
        }
        prometheus :9153
        forward . /etc/resolv.conf
        cache 30
        loop
        reload
        loadbalance
        import /etc/coredns/custom/*.override
    }
    import /etc/coredns/custom/*.server
  NodeHosts: |
    192.168.10.160 k8s-master01
    192.168.10.161 k8s-worker01
    192.168.10.240 www.kubemsb.com work.kubemsb.com
kind: ConfigMap
......[root@k8s-master01 ~]# dig -t a www.kubemsb.com @10.43.0.10
; <<>> DiG 9.11.4-P2-RedHat-9.11.4-26.P2.el7_9.9 <<>> -t a www.kubemsb.com @10.43.0.10
;; global options: +cmd
;; Got answer:
;; ->>HEADER<<- opcode: QUERY, status: NOERROR, id: 4739
;; flags: qr aa rd; QUERY: 1, ANSWER: 1, AUTHORITY: 0, ADDITIONAL: 1
;; WARNING: recursion requested but not available
;; OPT PSEUDOSECTION:
; EDNS: version: 0, flags:; udp: 4096
;; QUESTION SECTION:
;www.kubemsb.com. IN A
;; ANSWER SECTION:
www.kubemsb.com. 30 IN A 192.168.10.240
;; Query time: 0 msec
;; SERVER: 10.43.0.10#53(10.43.0.10)
;; WHEN: 五 12月 22 11:21:33 CST 2023
;; MSG SIZE rcvd: 75[root@k8s-master01 ~]# export PX_CLOUD_ADDR=www.kubemsb.com[root@k8s-master01 ~]# px auth login
Pixie CLI
*******************************
* ENV VARS
* PX_CLOUD_ADDR=www.kubemsb.com
*******************************
Starting browser... (if browser-based login fails, try running `px auth login --manual` for headless login)
Fetching refresh token ...
Authentication Successful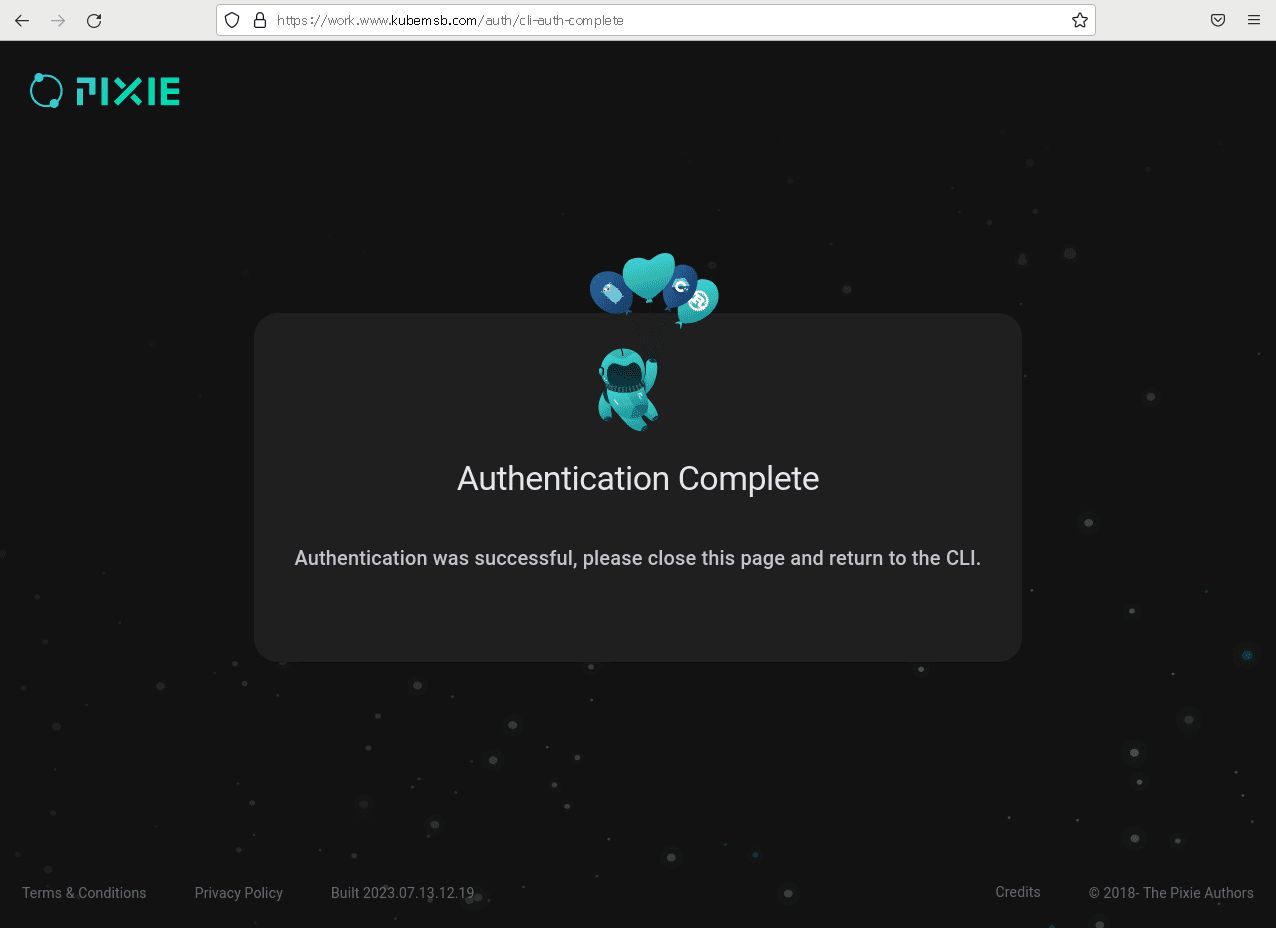
# Deploy the Pixie Platform in your K8s cluster (No OLM present on cluster).
px deploy --dev_cloud_namespace plc --kubeconfig=/etc/rancher/k3s/k3s.yaml

# Deploy the Pixie Platform in your K8s cluster (OLM already exists on cluster).
px deploy  --dev_cloud_namespace plc --deploy_olm=false

# Deploy Pixie with a specific memory limit (2Gi is the default, 1Gi is the minimum recommended)
px deploy --dev_cloud_namespace plc --pem_memory_limit=1Gi[root@k8s-master01 ~]# px deploy --dev_cloud_namespace plc --deploy_olm=false --kubeconfig=/etc/rancher/k3s/k3s.yaml
Pixie CLI
*******************************
* ENV VARS
* PX_CLOUD_ADDR=www.kubemsb.com
*******************************
Running Cluster Checks:
✔ Kernel version > 4.14.0
✔ Cluster type is supported
✔ K8s version > 1.16.0
✔ Kubectl > 1.10.0 is present
✔ User can create namespace
✔ Cluster type is in list of known supported types
Installing Vizier version: 0.12.12
Generating YAMLs for Pixie
Deploying Pixie to the following cluster: default
Is the cluster correct? (y/n) [y] : y
Found 2 nodes
✔ Installing Vizier CRD
✔ Deploying Pixie OLM Namespace
✔ Deploying OLM Catalog
✔ Deploying OLM Subscription
✔ Creating namespace
✔ Deploying Vizier
✔ Waiting for Cloud Connector to come online
Waiting for Pixie to pass healthcheck
✔ Wait for PEMs/Kelvin
✔ Wait for healthcheck
==> Next Steps:
Run some scripts using the px cli. For example:
- px script list : to show pre-installed scripts.
- px run px/service_stats : to run service info for sock-shop demo application (service selection coming soon!).
Check out our docs: https://docs.px.dev.
Visit : https://work.www.kubemsb.com:443 to use Pixie's UI.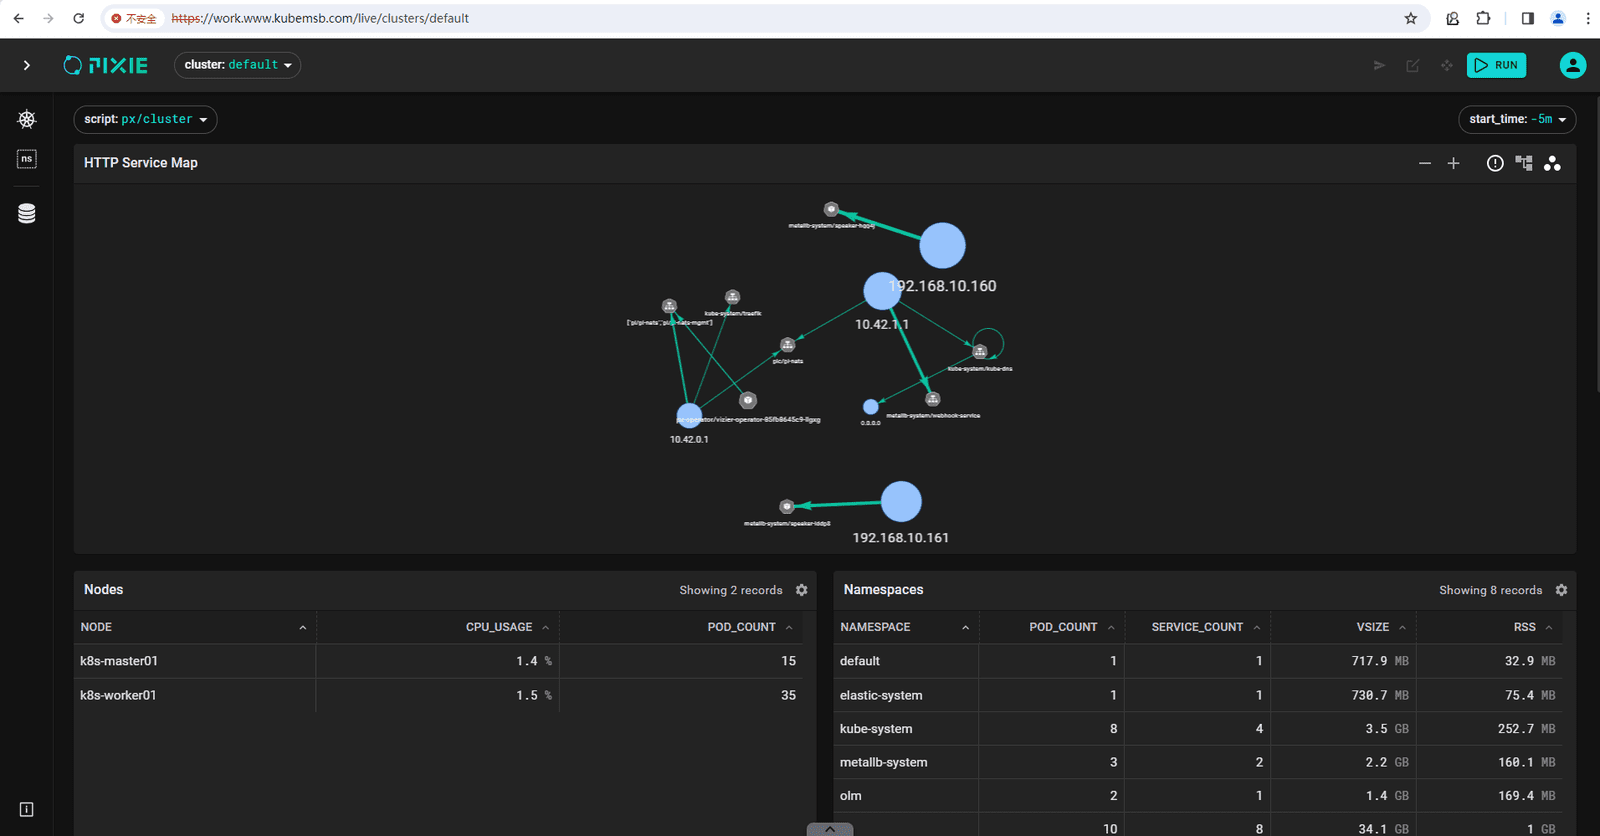
三、Pixie使用
3.1 部署应用
[root@k8s-master01 ~]# vim nginx.yaml
[root@k8s-master01 ~]# cat nginx.yaml
---
apiVersion: apps/v1
kind: Deployment
metadata:
  name: nginxweb
spec:
  selector:
    matchLabels:
      app: nginxweb1
  replicas: 5
  template:
    metadata:
      labels:
        app: nginxweb1
    spec:
      containers:
      - name: nginxwebc
        image: nginx:latest
        imagePullPolicy: IfNotPresent
        ports:
        - containerPort: 80

---

apiVersion: v1
kind: Service
metadata:
  name: nginxweb-service
spec:
  externalTrafficPolicy: Cluster
  selector:
    app: nginxweb1
  ports:
  - protocol: TCP
    port: 80
    targetPort: 80
    nodePort: 30080
type: NodePort[root@k8s-master01 ~]# kubectl apply -f nginx.yaml[root@k8s-master01 ~]# kubectl get pods
NAME READY STATUS RESTARTS AGE
nginxweb-64c569cccc-bgq4t 1/1 Running 1 (23m ago) 43m
nginxweb-64c569cccc-hxwlz 1/1 Running 1 (23m ago) 43m
nginxweb-64c569cccc-lssnh 1/1 Running 1 (23m ago) 43m
nginxweb-64c569cccc-pcb7c 1/1 Running 1 (23m ago) 43m
nginxweb-64c569cccc-rn8k2 1/1 Running 1 (23m ago) 43m[root@k8s-master01 ~]# kubectl get svc
NAME TYPE CLUSTER-IP EXTERNAL-IP PORT(S) AGE
kubernetes ClusterIP 10.43.0.1 <none> 443/TCP 151m
nginxweb-service NodePort 10.43.102.161 <none> 80:30080/TCP 44m3.2 应用访问
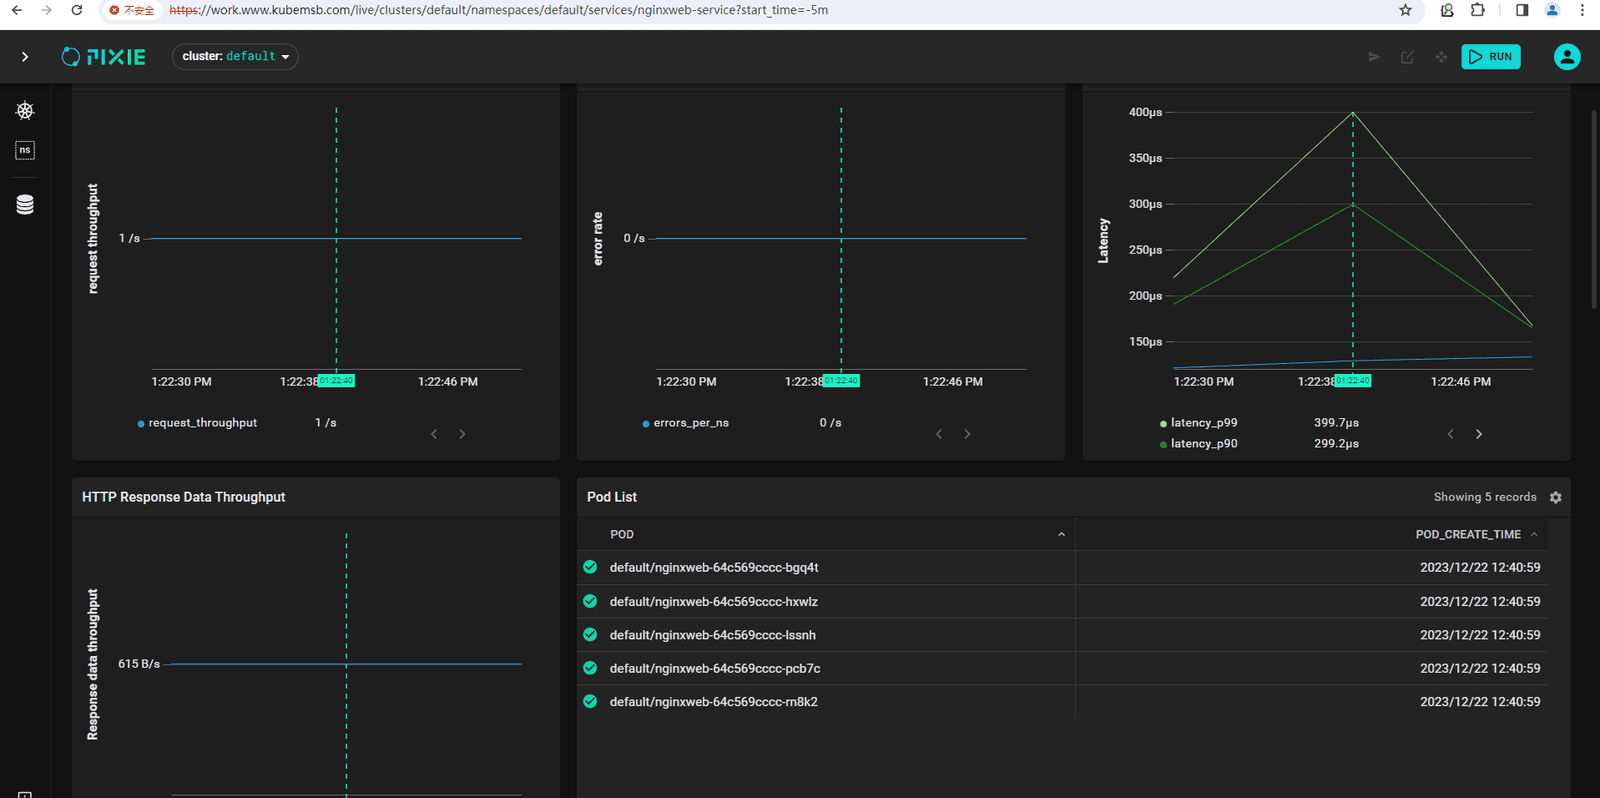
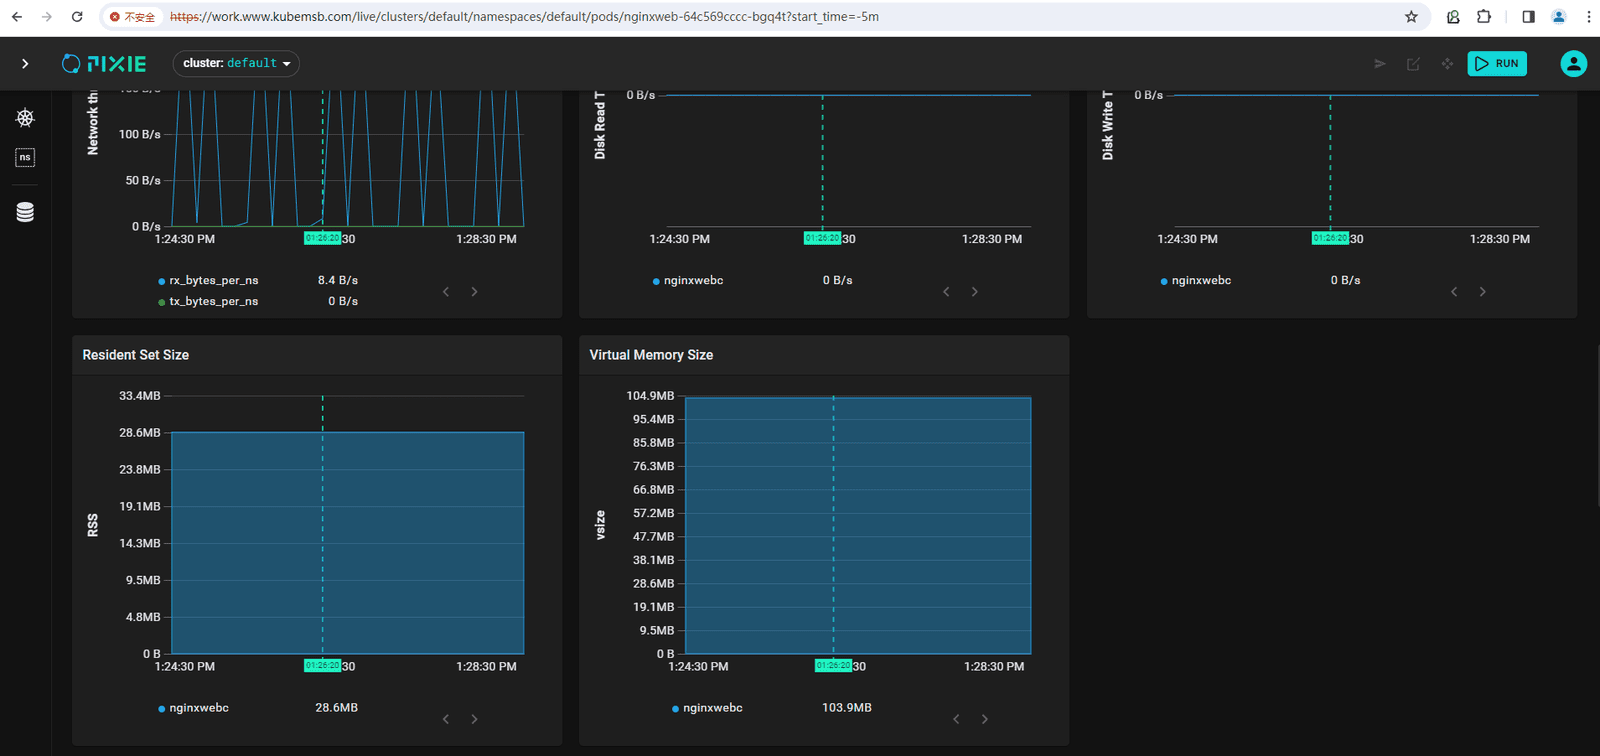
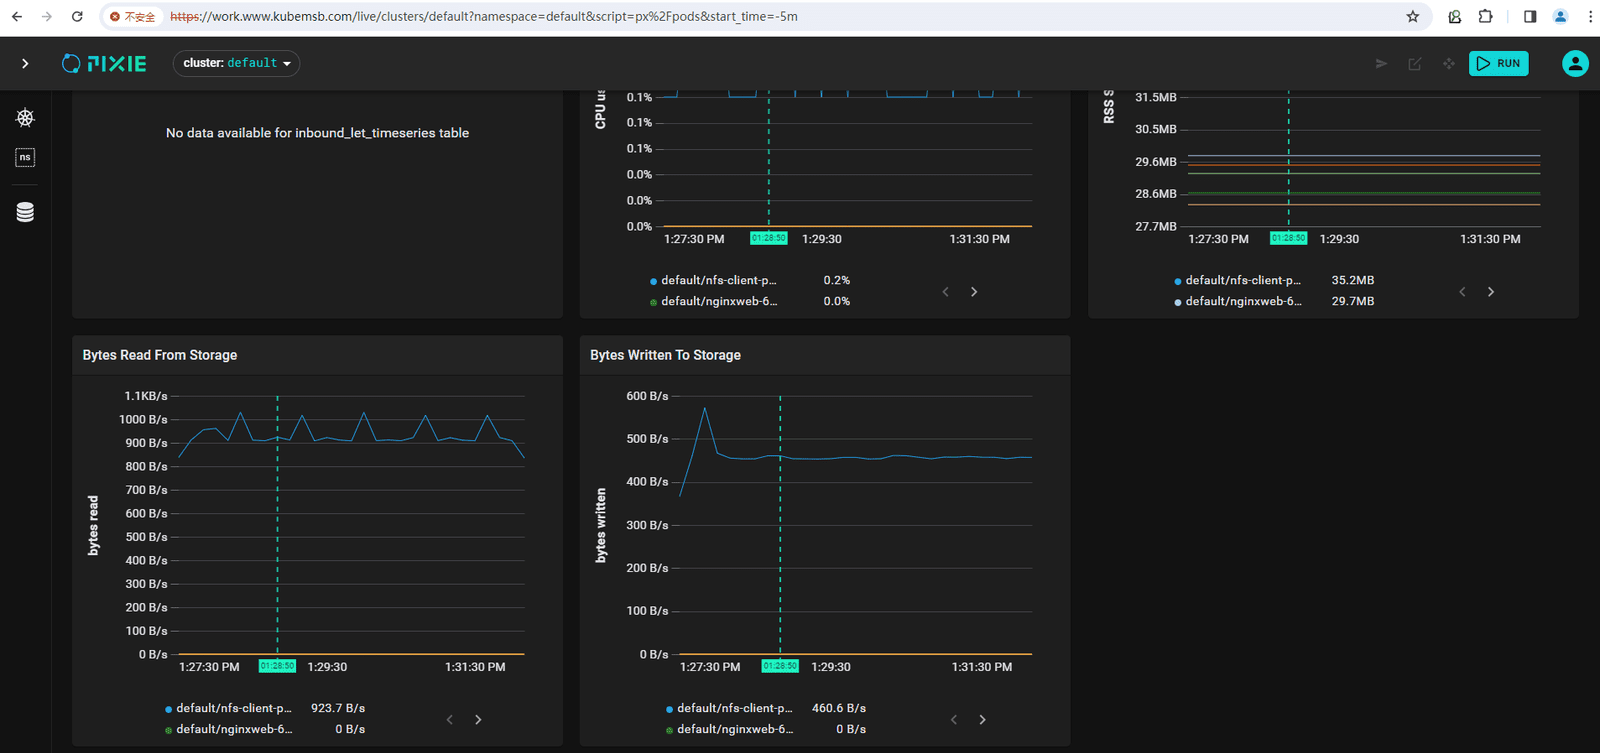
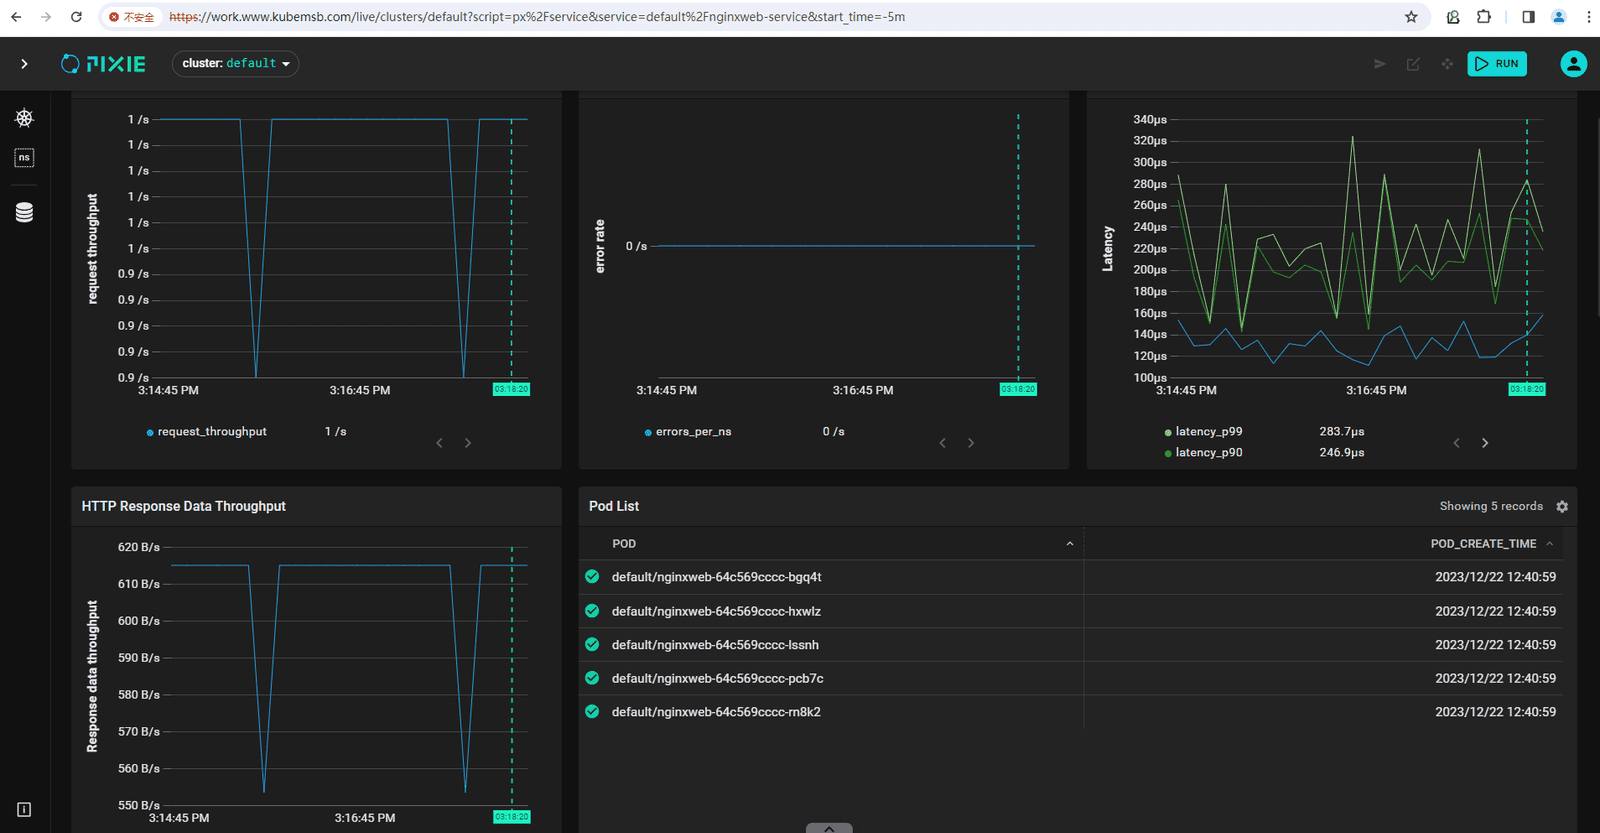
[root@k8s-master01 ~]# while true; do curl http://192.168.10.161:30080;sleep 1; done3.3 观测图示