
K8S 1.22 版本集群部署
2026/8/13大约 7 分钟
边缘计算 · 第 1 篇
来源课程笔记整理优化;插图已迁入博客静态目录。
K8S 1.22版本集群部署
一、主机准备
1.1 主机名配置
由于本次使用3台主机完成kubernetes集群部署,其中1台为master节点,名称为k8s-master01;其中2台为worker节点,名称分别为:k8s-worker01及k8s-worker02
master节点
# hostnamectl set-hostname k8s-master01
worker01节点
# hostnamectl set-hostname k8s-worker01worker02节点
# hostnamectl set-hostname k8s-worker021.2 主机IP地址配置
1.2.1 k8s-master节点
[root@k8s-master01 ~]# vim /etc/sysconfig/network-scripts/ifcfg-ens33
[root@k8s-master01 ~]# cat /etc/sysconfig/network-scripts/ifcfg-ens33
TYPE="Ethernet"
PROXY_METHOD="none"
BROWSER_ONLY="no"
BOOTPROTO="none"
DEFROUTE="yes"
IPV4_FAILURE_FATAL="no"
NAME="ens33"
UUID="063bfc1c-c7c2-4c62-89d0-35ae869e44e7"
DEVICE="ens33"
ONBOOT="yes"
IPADDR="192.168.10.160"
PREFIX="24"
GATEWAY="192.168.10.2"
DNS1="119.29.29.29"[root@k8s-master01 ~]# systemctl restart network[root@k8s-master01 ~]# ip a s1.2.2 k8s-worker01节点
[root@k8s-worker01 ~]# vim /etc/sysconfig/network-scripts/ifcfg-ens33
[root@k8s-worker01 ~]# cat /etc/sysconfig/network-scripts/ifcfg-ens33
TYPE="Ethernet"
PROXY_METHOD="none"
BROWSER_ONLY="no"
BOOTPROTO="none"
DEFROUTE="yes"
IPV4_FAILURE_FATAL="no"
NAME="ens33"
UUID="063bfc1c-c7c2-4c62-89d0-35ae869e44e7"
DEVICE="ens33"
ONBOOT="yes"
IPADDR="192.168.10.161"
PREFIX="24"
GATEWAY="192.168.10.2"
DNS1="119.29.29.29"[root@k8s-worker01 ~]# systemctl restart network[root@k8s-worker01 ~]# ip a s1.2.3 k8s-worker02节点
[root@k8s-worker02 ~]# vim /etc/sysconfig/network-scripts/ifcfg-ens33
[root@k8s-worker02 ~]# cat /etc/sysconfig/network-scripts/ifcfg-ens33
TYPE="Ethernet"
PROXY_METHOD="none"
BROWSER_ONLY="no"
BOOTPROTO="none"
DEFROUTE="yes"
IPV4_FAILURE_FATAL="no"
NAME="ens33"
UUID="063bfc1c-c7c2-4c62-89d0-35ae869e44e7"
DEVICE="ens33"
ONBOOT="yes"
IPADDR="192.168.10.162"
PREFIX="24"
GATEWAY="192.168.10.2"
DNS1="119.29.29.29"[root@k8s-worker02 ~]# systemctl restart network[root@k8s-worker02 ~]# ip a s1.3 主机名解析
# vim /etc/hosts
# cat /etc/hosts
127.0.0.1   localhost localhost.localdomain localhost4 localhost4.localdomain4
::1         localhost localhost.localdomain localhost6 localhost6.localdomain6
192.168.10.160 k8s-master01
192.168.10.161 k8s-worker01
192.168.10.162 k8s-worker02
1.4 主机安全设置
所有主机均需操作。
# systemctl stop firewalld && systemctl disable firewalld# sed -ri 's/SELINUX=enforcing/SELINUX=disabled/' /etc/selinux/config1.5 升级操作系统内核
所有主机均需要操作。
导入elrepo gpg key
# rpm --import https://www.elrepo.org/RPM-GPG-KEY-elrepo.org
安装elrepo YUM源仓库
# yum -y install https://www.elrepo.org/elrepo-release-7.0-4.el7.elrepo.noarch.rpm安装kernel-ml版本,ml为长期稳定版本,lt为长期维护版本
# yum --enablerepo="elrepo-kernel" -y install kernel-lt.x86_64设置grub2默认引导为0
# grub2-set-default 0重新生成grub2引导文件
# grub2-mkconfig -o /boot/grub2/grub.cfg更新后,需要重启,使用升级的内核生效。
# reboot重启后,需要验证内核是否为更新对应的版本
# uname -r1.6 配置内核转发及网桥过滤
所有主机均需要操作。
添加网桥过滤及内核转发配置文件
# cat /etc/sysctl.d/k8s.conf
net.bridge.bridge-nf-call-ip6tables = 1
net.bridge.bridge-nf-call-iptables = 1
vm.swappiness = 0
加载br_netfilter模块
# modprobe br_netfilter查看是否加载
# lsmod | grep br_netfilter
br_netfilter 22256 0
bridge 151336 1 br_netfilter1.7 调整主机内核参数
# vim /etc/sysctl.conf
添加如下内容:
net.ipv4.ip_forward = 1
net.ipv6.conf.all.forwarding = 1
net.ipv4.ip_nonlocal_bind = 1
使其生效
# sysctl -p /etc/sysctl.conf1.8 主机时钟同步设置
# crontab -e
0 */1 * * * ntpdate time1.aliyun.com
1.9 主机swap分区设置
临时关闭
# swapoff -a
永远关闭swap分区,需要重启操作系统
# cat /etc/fstab
......
# /dev/mapper/centos-swap swap swap defaults 0 0
在上一行中行首添加#二、Docker安装
2.1 Docker安装YUM源准备
使用阿里云开源软件镜像站。
# wget https://mirrors.aliyun.com/docker-ce/linux/centos/docker-ce.repo -O /etc/yum.repos.d/docker-ce.repo2.2 Docker安装
# yum -y install docker-ce2.3 启动Docker服务
# systemctl enable --now docker2.4 修改cgroup方式
/etc/docker/daemon.json 默认没有此文件,需要单独创建
在/etc/docker/daemon.json添加如下内容

# cat /etc/docker/daemon.json
{
        "exec-opts": ["native.cgroupdriver=systemd"]
}
# systemctl restart docker三、k8s软件安装
3.1 YUM源准备
# vim /etc/yum.repos.d/k8s.repo
# cat > /etc/yum.repos.d/k8s.repo << EOF
[kubernetes]
name=Kubernetes
baseurl=https://mirrors.aliyun.com/kubernetes/yum/repos/kubernetes-el7-x86_64/
enabled=1
gpgcheck=0
repo_gpgcheck=0
gpgkey=https://mirrors.aliyun.com/kubernetes/yum/doc/yum-key.gpg https://mirrors.aliyun.com/kubernetes/yum/doc/rpm-package-key.gpg
EOF
3.2 K8S软件安装及kubelet配置
3.2.1 软件安装
# yum -y install kubeadm-1.22.11-0 kubelet-1.22.11-0 kubectl-1.22.11-03.2.2 kubelet配置
为了实现docker使用的cgroupdriver与kubelet使用的cgroup的一致性,建议修改如下文件内容。
# vim /etc/sysconfig/kubelet
KUBELET_EXTRA_ARGS="--cgroup-driver=systemd"
设置kubelet为开机自启动即可,由于没有生成配置文件,集群初始化后自动启动
# systemctl enable kubelet3.3 K8S集群初始化
[root@k8s-master01 ~]# kubeadm init --kubernetes-version=v1.22.11 --pod-network-cidr=10.244.0.0/16 --apiserver-advertise-address=192.168.10.160输出信息:
[init] Using Kubernetes version: v1.22.11
[preflight] Running pre-flight checks
[WARNING Service-Kubelet]: kubelet service is not enabled, please run 'systemctl enable kubelet.service'
[preflight] Pulling images required for setting up a Kubernetes cluster
[preflight] This might take a minute or two, depending on the speed of your internet connection
[preflight] You can also perform this action in beforehand using 'kubeadm config images pull'
[certs] Using certificateDir folder "/etc/kubernetes/pki"
[certs] Generating "ca" certificate and key
[certs] Generating "apiserver" certificate and key
[certs] apiserver serving cert is signed for DNS names [k8s-master01 kubernetes kubernetes.default kubernetes.default.svc kubernetes.default.svc.cluster.local] and IPs [10.96.0.1 192.168.10.160]
[certs] Generating "apiserver-kubelet-client" certificate and key
[certs] Generating "front-proxy-ca" certificate and key
[certs] Generating "front-proxy-client" certificate and key
[certs] Generating "etcd/ca" certificate and key
[certs] Generating "etcd/server" certificate and key
[certs] etcd/server serving cert is signed for DNS names [k8s-master01 localhost] and IPs [192.168.10.160 127.0.0.1 ::1]
[certs] Generating "etcd/peer" certificate and key
[certs] etcd/peer serving cert is signed for DNS names [k8s-master01 localhost] and IPs [192.168.10.160 127.0.0.1 ::1]
[certs] Generating "etcd/healthcheck-client" certificate and key
[certs] Generating "apiserver-etcd-client" certificate and key
[certs] Generating "sa" key and public key
[kubeconfig] Using kubeconfig folder "/etc/kubernetes"
[kubeconfig] Writing "admin.conf" kubeconfig file
[kubeconfig] Writing "kubelet.conf" kubeconfig file
[kubeconfig] Writing "controller-manager.conf" kubeconfig file
[kubeconfig] Writing "scheduler.conf" kubeconfig file
[kubelet-start] Writing kubelet environment file with flags to file "/var/lib/kubelet/kubeadm-flags.env"
[kubelet-start] Writing kubelet configuration to file "/var/lib/kubelet/config.yaml"
[kubelet-start] Starting the kubelet
[control-plane] Using manifest folder "/etc/kubernetes/manifests"
[control-plane] Creating static Pod manifest for "kube-apiserver"
[control-plane] Creating static Pod manifest for "kube-controller-manager"
[control-plane] Creating static Pod manifest for "kube-scheduler"
[etcd] Creating static Pod manifest for local etcd in "/etc/kubernetes/manifests"
[wait-control-plane] Waiting for the kubelet to boot up the control plane as static Pods from directory "/etc/kubernetes/manifests". This can take up to 4m0s
[apiclient] All control plane components are healthy after 5.501915 seconds
[upload-config] Storing the configuration used in ConfigMap "kubeadm-config" in the "kube-system" Namespace
[kubelet] Creating a ConfigMap "kubelet-config" in namespace kube-system with the configuration for the kubelets in the cluster
[upload-certs] Skipping phase. Please see --upload-certs
[mark-control-plane] Marking the node k8s-master01 as control-plane by adding the labels: [node-role.kubernetes.io/control-plane node.kubernetes.io/exclude-from-external-load-balancers]
[mark-control-plane] Marking the node k8s-master01 as control-plane by adding the taints [node-role.kubernetes.io/control-plane:NoSchedule]
[bootstrap-token] Using token: tf68fl.pj4xsh62osypb4bj
[bootstrap-token] Configuring bootstrap tokens, cluster-info ConfigMap, RBAC Roles
[bootstrap-token] Configured RBAC rules to allow Node Bootstrap tokens to get nodes
[bootstrap-token] Configured RBAC rules to allow Node Bootstrap tokens to post CSRs in order for nodes to get long term certificate credentials
[bootstrap-token] Configured RBAC rules to allow the csrapprover controller automatically approve CSRs from a Node Bootstrap Token
[bootstrap-token] Configured RBAC rules to allow certificate rotation for all node client certificates in the cluster
[bootstrap-token] Creating the "cluster-info" ConfigMap in the "kube-public" namespace
[kubelet-finalize] Updating "/etc/kubernetes/kubelet.conf" to point to a rotatable kubelet client certificate and key
[addons] Applied essential addon: CoreDNS
[addons] Applied essential addon: kube-proxy
Your Kubernetes control-plane has initialized successfully!
To start using your cluster, you need to run the following as a regular user:
mkdir -p $HOME/.kube
sudo cp -i /etc/kubernetes/admin.conf $HOME/.kube/config
sudo chown $(id -u):$(id -g) $HOME/.kube/config
Alternatively, if you are the root user, you can run:
export KUBECONFIG=/etc/kubernetes/admin.conf
You should now deploy a pod network to the cluster.
Run "kubectl apply -f [podnetwork].yaml" with one of the options listed at:
https://kubernetes.io/docs/concepts/cluster-administration/addons/
Then you can join any number of worker nodes by running the following on each as root:
kubeadm join 192.168.10.160:6443 --token tf68fl.pj4xsh62osypb4bj \
--discovery-token-ca-cert-hash sha256:e4960afef684bbee72ae904356321997a6eef5bb0394a8d74b72ebaa0b638ecd[root@k8s-master01 ~]# mkdir -p $HOME/.kube
[root@k8s-master01 ~]# sudo cp -i /etc/kubernetes/admin.conf $HOME/.kube/config
[root@k8s-master01 ~]# sudo chown $(id -u):$(id -g) $HOME/.kube/config[root@k8s-master01 ~]# kubectl get nodes
NAME STATUS ROLES AGE VERSION
k8s-master01 NotReady control-plane 2m5s v1.22.113.4 把工作节点添加到K8S集群
[root@k8s-worker01 ~]# kubeadm join 192.168.10.160:6443 --token tf68fl.pj4xsh62osypb4bj \
--discovery-token-ca-cert-hash sha256:e4960afef684bbee72ae904356321997a6eef5bb0394a8d74b72ebaa0b638ecd[root@k8s-worker02 ~]# kubeadm join 192.168.10.160:6443 --token tf68fl.pj4xsh62osypb4bj \
--discovery-token-ca-cert-hash sha256:e4960afef684bbee72ae904356321997a6eef5bb0394a8d74b72ebaa0b638ecd[root@k8s-master01 ~]# kubectl get nodes
NAME STATUS ROLES AGE VERSION
k8s-master01 NotReady control-plane 19m v1.22.11
k8s-worker01 NotReady <none> 4m44s v1.22.11
k8s-worker02 NotReady <none> 31s v1.22.11四、集群网络准备
使用calico部署集群网络
安装参考网址:https://projectcalico.docs.tigera.io/about/about-calico
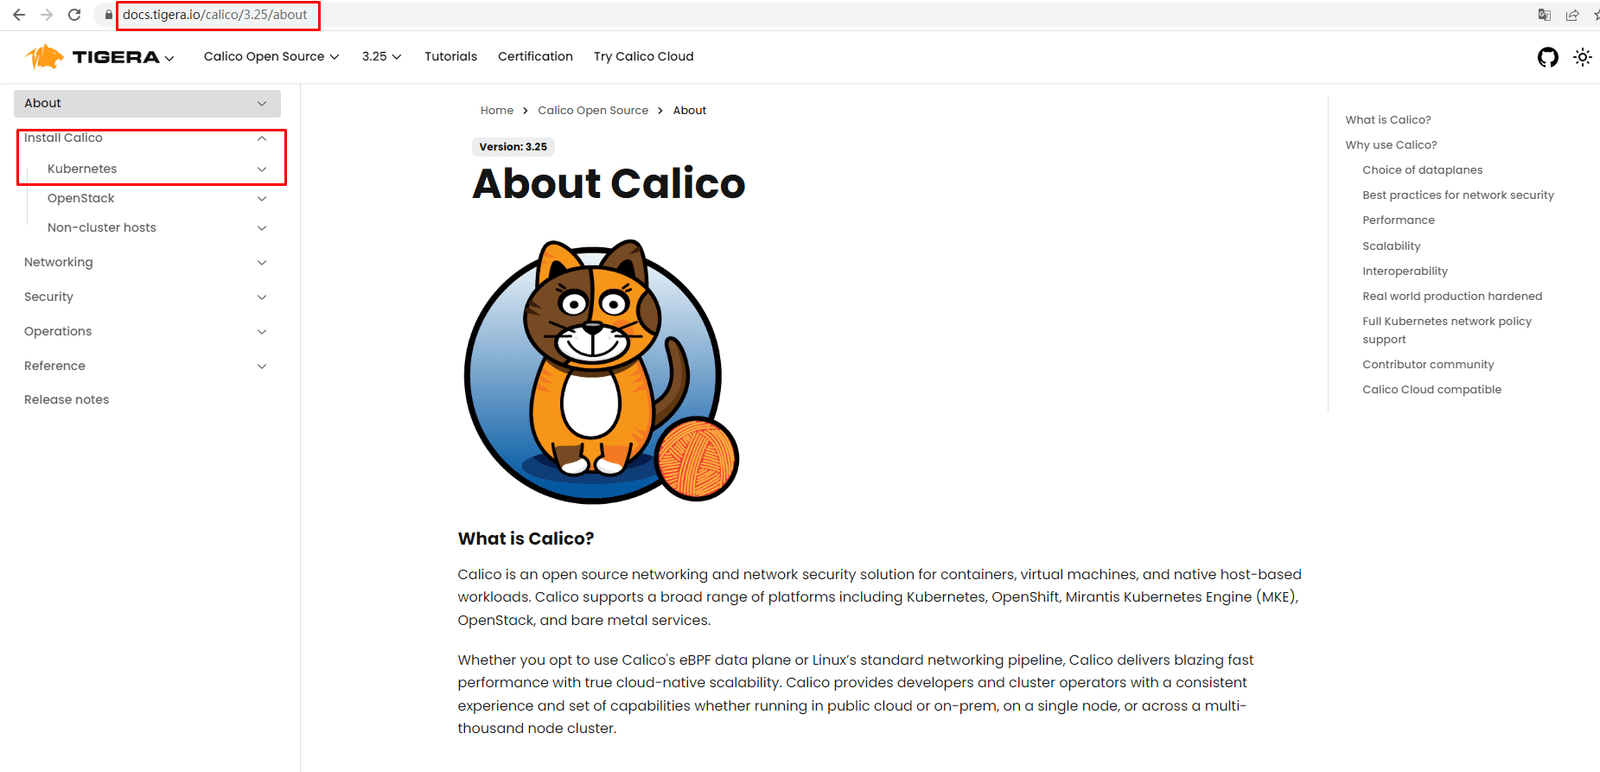
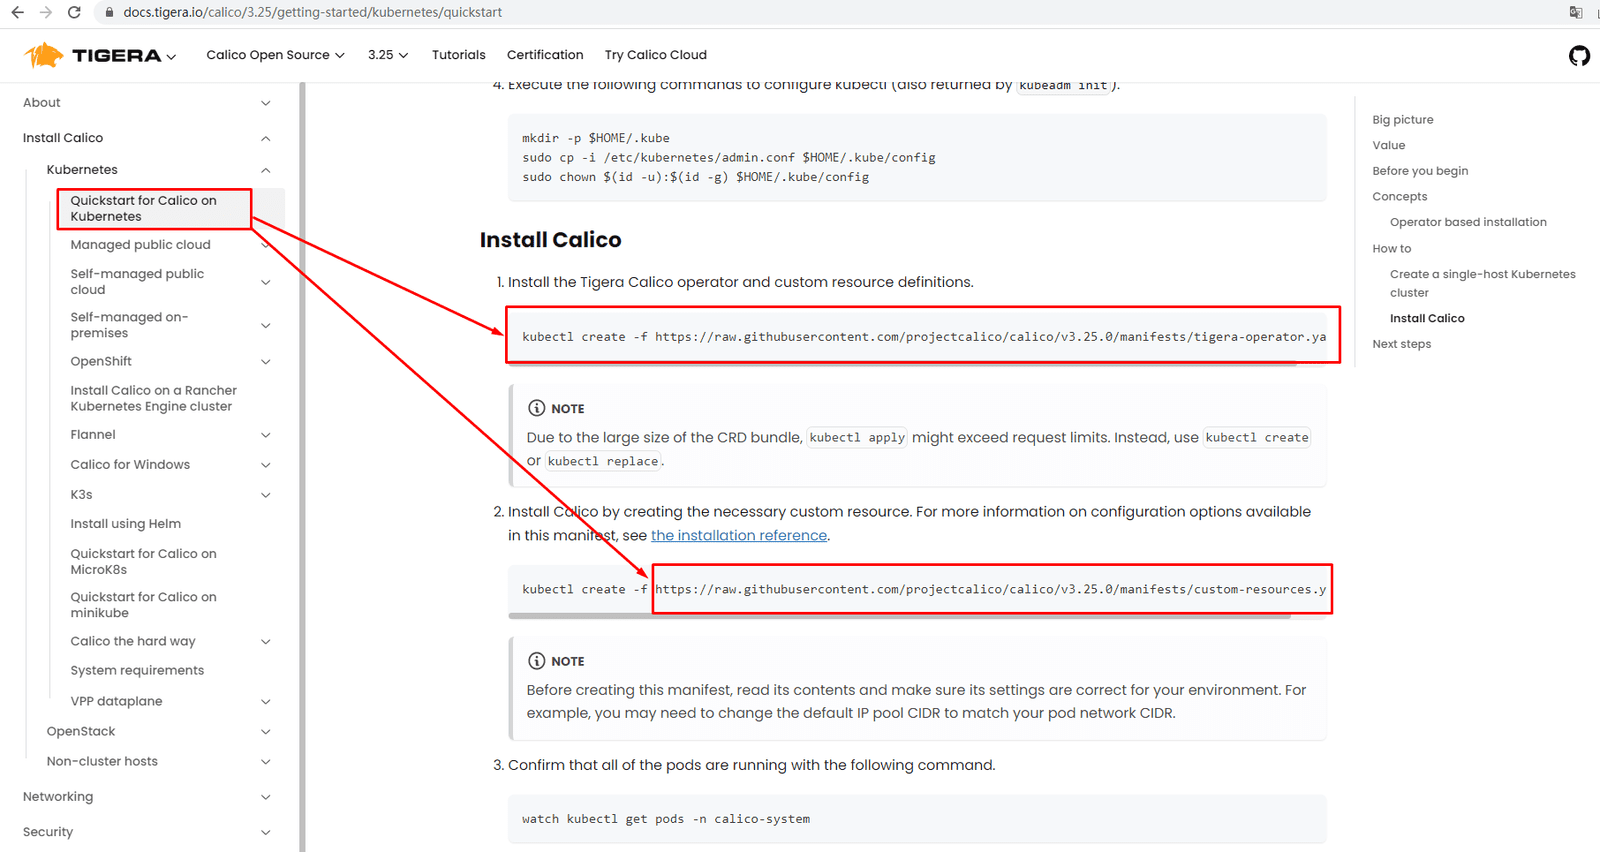
应用operator资源清单文件
[root@k8s-master01 ~]# kubectl create -f https://raw.githubusercontent.com/projectcalico/calico/v3.25.0/manifests/tigera-operator.yaml
通过自定义资源方式安装
[root@k8s-master01 ~]# wget https://raw.githubusercontent.com/projectcalico/calico/v3.25.0/manifests/custom-resources.yaml修改文件第13行,修改为使用kubeadm init ----pod-network-cidr对应的IP地址段
[root@k8s-master01 ~]# vim custom-resources.yaml
......
11 ipPools:
12 - blockSize: 26
13 cidr: 10.244.0.0/16
14 encapsulation: VXLANCrossSubnet
......应用资源清单文件
[root@k8s-master01 ~]# kubectl create -f custom-resources.yaml监视calico-sysem命名空间中pod运行情况
[root@k8s-master01 ~]# watch kubectl get pods -n calico-systemWait until each pod has the
STATUSofRunning.
已经全部运行
[root@k8s-master01 ~]# kubectl get pods -n calico-system
NAME                                      READY   STATUS    RESTARTS   AGE
calico-kube-controllers-666bb9949-dzp68   1/1     Running   0          11m
calico-node-jhcf4                         1/1     Running   4          11m
calico-typha-68b96d8d9c-7qfq7             1/1     Running   2          11m