
终端美化全记录——Windows Terminal + PowerShell + cmd + Ubuntu 从 0 开始
0. 先看效果
四张截图全部来自我这台机器的真实运行(Windows Terminal 1.25,Dracula 配色,MesloLGS Nerd Font 字体):
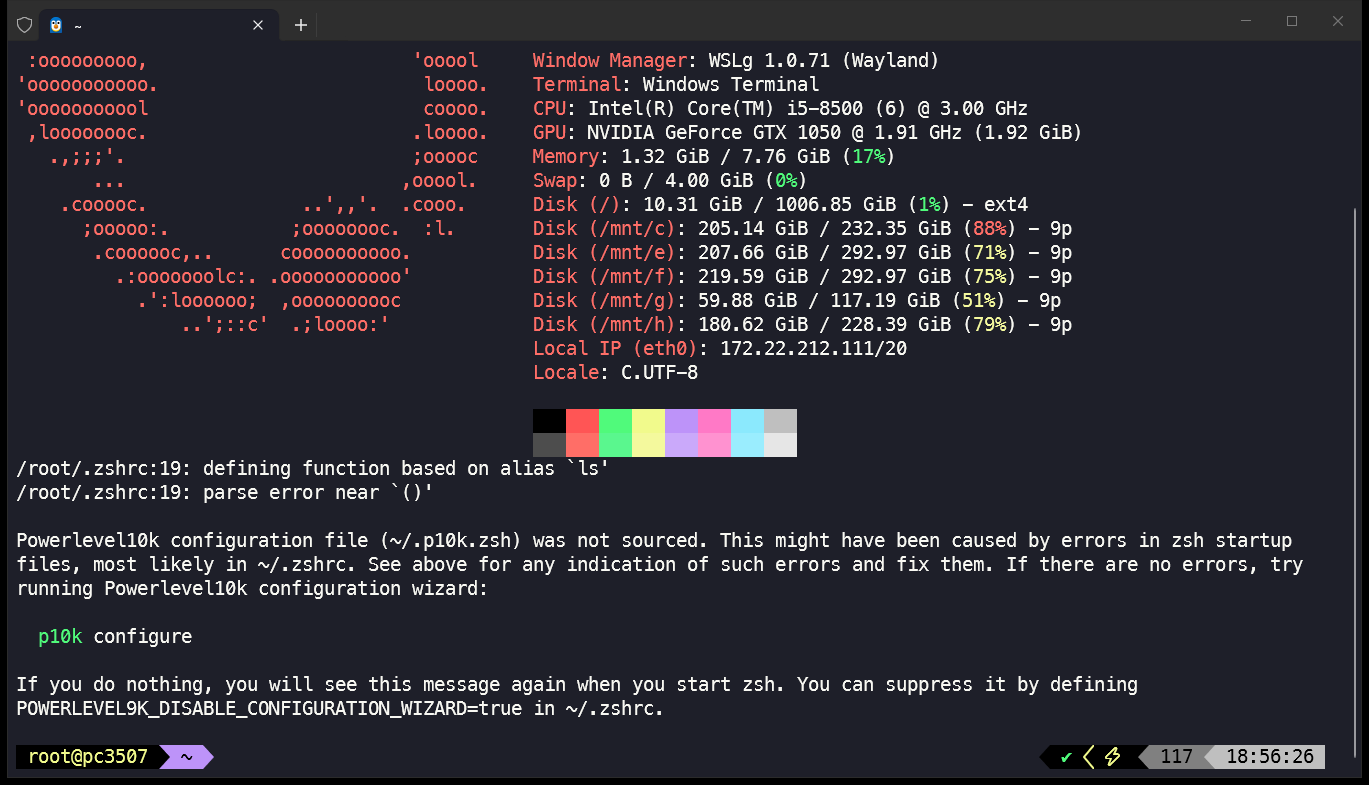
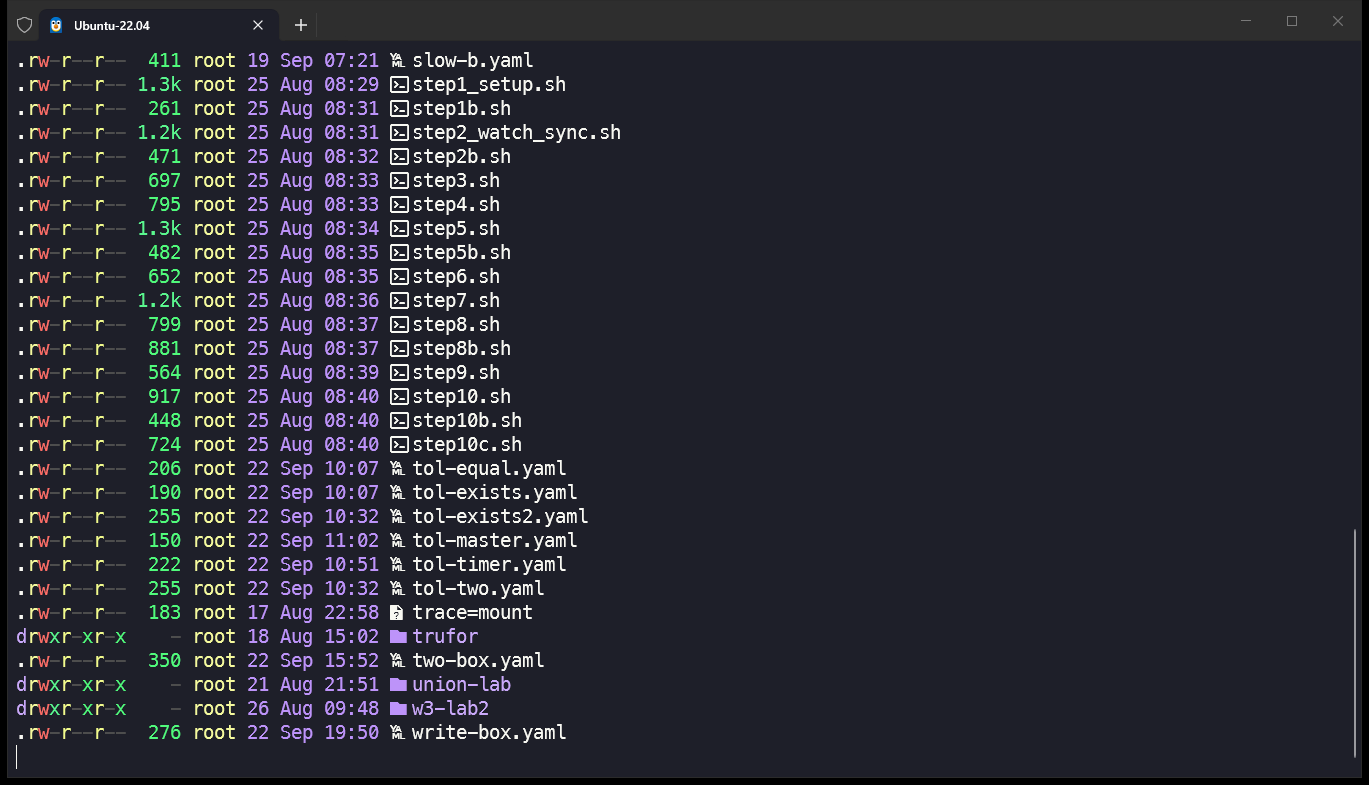
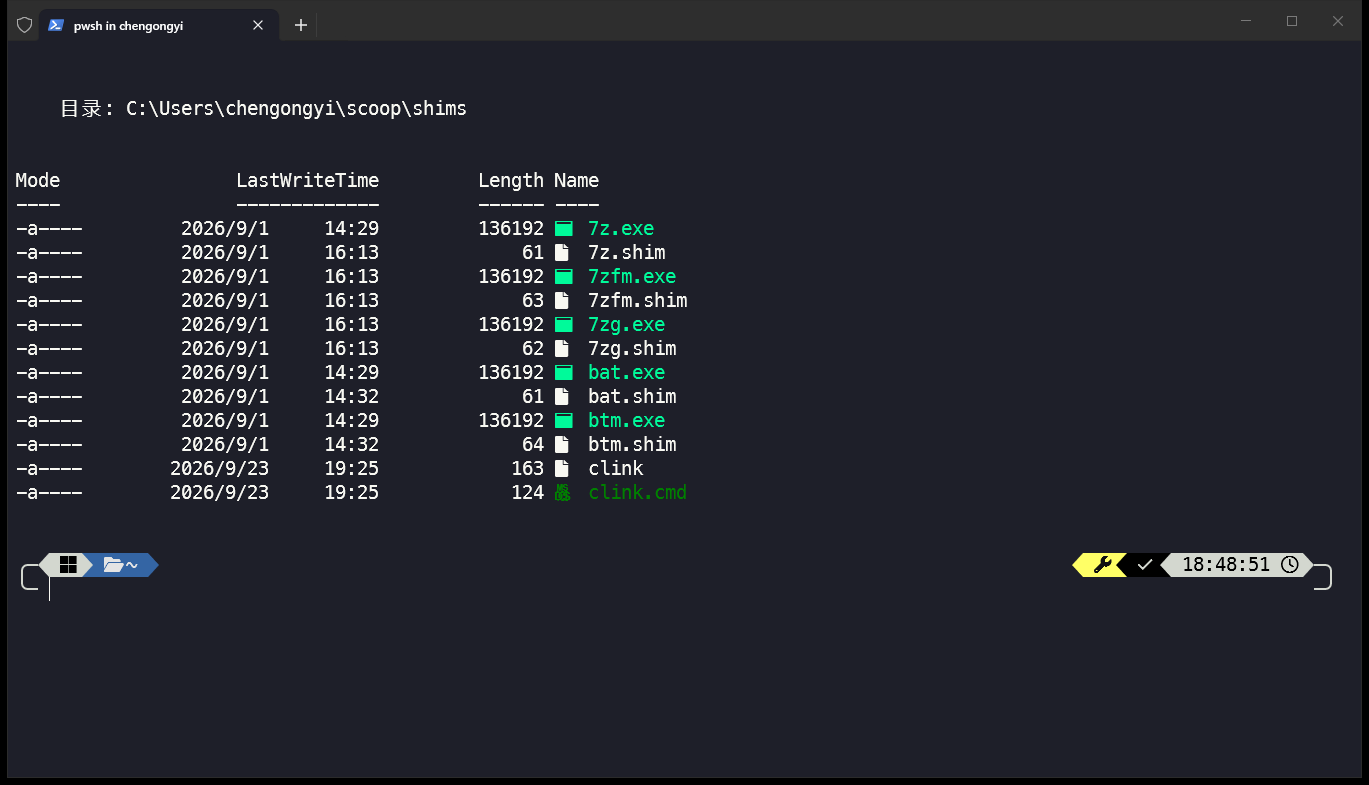
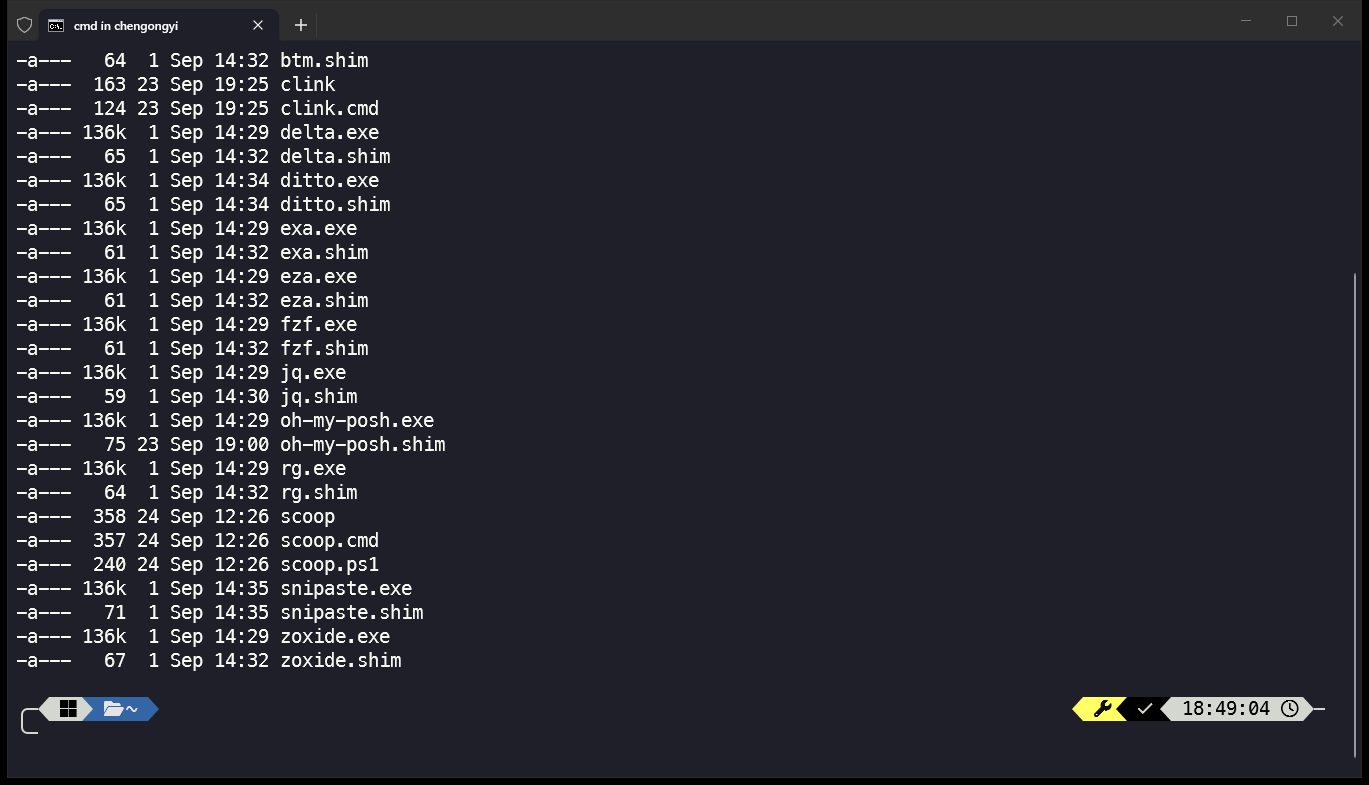
这篇文章记录的就是从零到这四张图的全部步骤。所有命令输出都是本机真实运行结果,所有工具版本都是本机当前安装的版本(2026-09-24 记录)。
1. 先把名词捋清楚(每个词第一次出现就解释)
终端(Terminal):一个「窗口程序」,它的功能只有一件事——显示文字、接收键盘输入。它自己不会执行命令。
Shell(壳):真正接收你敲的命令、解释并执行的程序。你输入 dir、ls,是 shell 在干活。
控制台(console):Windows 里最老的那种终端窗口,按 Win+R 输入 cmd 弹出来的黑框框,界面简陋、默认不能多标签。
Windows Terminal(WT):微软官方出的新一代终端窗口,官网 https://github.com/microsoft/terminal 。支持多标签页、多窗格、自定义配色、自定义字体、透明度……本文的主角,就是下面这个「窗口」:
┌─────────────────────────────────────────────┐
│  Windows Terminal(窗口 + 标签页 + 配色)      │
│  ┌─────────┬─────────┬─────────┬─────────┐  │
│  │Ubuntu标签│PowerShell标签│cmd标签│ Git Bash │  │
│  └─────────┴─────────┴─────────┴─────────┘  │
│        里面各自跑着一个 shell 程序             │
└─────────────────────────────────────────────┘
一次安装 Windows Terminal,PowerShell、cmd、Ubuntu(WSL)、Git Bash 全都能装进同一个窗口里,每个标签页一种 shell。
WSL(Windows Subsystem for Linux):Windows 里跑真 Linux 的官方方案,文档:https://learn.microsoft.com/windows/wsl/ 。我机器上装的是 Ubuntu 22.04:
> wsl -l -v
  NAME            STATE           VERSION
* Ubuntu-22.04    Running         2
wsl -l -v 的意思是列出(list)所有已安装的 Linux 发行版(-v 表示显示版本号列);VERSION 2 就是 WSL 第二代,性能比一代好很多。星号 * 表示默认发行版。
2. 总体方案:一个窗口,三个 shell,各自美化
| 层 | 用什么 | 美化件 | 效果 |
|---|---|---|---|
| 终端窗口 | Windows Terminal | Dracula 配色 + MesloLGS Nerd Font 字体 | 深色主题、图标不乱码 |
| shell 1:Ubuntu | zsh + oh-my-zsh | powerlevel10k 主题 + 两个补全插件 | 彩色提示符、命令记忆建议、语法高亮 |
| shell 2:PowerShell | Windows PowerShell 5.1 | Oh My Posh + Terminal-Icons + PSReadLine + zoxide | 彩虹提示符、文件图标、历史预测、智能跳目录 |
| shell 3:cmd | cmd.exe + Clink | Oh My Posh(Lua 桥接)+ zoxide | 老 cmd 也获得现代化提示符和补全 |
| 工具层(三边通用) | scoop 装的一堆 CLI | eza / bat / fzf / ripgrep / delta / bottom … | 现代替代老命令 |
为什么 PowerShell 和 cmd 用 Oh My Posh、Ubuntu 用 powerlevel10k?没有硬性理由,历史原因:zsh 生态里 p10k 是事实标准,Windows 侧 Oh My Posh 是事实标准。两边我都选了带「彩色分段 + git 状态」的风格,视觉上保持接近。
3. 第一步:Windows Terminal
3.1 安装
标准安装(推荐给大多数人):微软商店搜 “Windows Terminal”,或者:
> winget install --id Microsoft.WindowsTerminalwinget 是 Windows 官方包管理器,Win10 1809+ 自带。
我这台机器用的是解压便携版,放在 H:\develop\terminal-1.25.1322.0\,双击 Terminal.exe 直接运行,不写注册表。真实版本号:
> (Get-Item "H:\develop\terminal-1.25.1322.0\Terminal.exe").VersionInfo.ProductVersion
1.25.260512002-preview
(这是我在 PowerShell 里读文件属性读出来的,Get-Item 拿到文件对象,.VersionInfo.ProductVersion 取版本字段。)
3.2 美化一:字体(Nerd Font,图标不乱码的前提)
Nerd Font:往普通等宽字体里塞进几千个「图标字符」(文件夹、git 分支、箭头等小图形)的字体家族,官网 https://www.nerdfonts.com 。
美化终端几乎必装,因为 Oh My Posh、eza、powerlevel10k 都会在提示符里放图标;用普通字体,图标显示成方块 □ 或问号。
我装的是 MesloLGS Nerd Font(powerlevel10k 官方推荐字体),四个字重装到用户字体目录 %LOCALAPPDATA%\Microsoft\Windows\Fonts\:
MesloLGSNerdFont-Bold.ttf
MesloLGSNerdFont-Italic.ttf
MesloLGSNerdFont-BoldItalic.ttf
MesloLGSNerdFont-Regular.ttf字体文件来源:https://github.com/romkatv/powerlevel10k#fonts (该节提供 MesloLGS NF 四个字重的直链,右键 “为当前用户安装” 即可)。
3.3 美化二:Dracula 配色
配色方案(color scheme):终端里 16 种基础颜色(黑、红、绿……及各自的亮色)+ 背景 + 前景的具体色值组合。程序输出的 “红色” 到底是哪个红,由配色方案决定。
Dracula:流行的深色配色,官网 https://draculatheme.com (有 Windows Terminal 官方移植版)。
打开 WT 的设置(Ctrl+,)→ 左侧 “配色方案” 可以直接选内置的;我是把 Dracula 的 16 色定义直接写进了 settings.json。WT 的设置文件路径(在 WT 里按 Ctrl+Shift+, 直接打开):
%LOCALAPPDATA%\Microsoft\Windows Terminal\settings.json我的关键配置(真实摘录,完整字段含义见官方 schema 文档 https://aka.ms/terminal-profiles-schema ):
{
    "profiles": {
        "defaults": {
            "colorScheme": "Dracula",
            "font": { "face": "MesloLGS Nerd Font", "size": 14 }
        },
        "list": [
            {
                "commandline": "wsl.exe -d Ubuntu-22.04 --cd ~",
                "cursorShape": "bar",
                "guid": "{d5ce5a2c-...}",
                "name": "Ubuntu-22.04"
            }
        ]
    },
    "schemes": [
        {
            "name": "Dracula",
            "background": "#1E1F29",
            "foreground": "#F8F8F2",
            "cursorColor": "#F8F8F2",
            "black": "#000000",  "red": "#FF5555",  "green": "#50FA7B",
            "yellow": "#F1FA8C", "blue": "#BD93F9", "purple": "#FF79C6",
            "cyan": "#8BE9FD",   "white": "#BFBFBF"
        }
    ],
    "defaultProfile": "{d5ce5a2c-...}"
}
三个字段逐个说:
profiles.defaults:对所有标签页生效的默认值——每个 shell 都用 Dracula 配色和 MesloLGS Nerd Font 14 号字;schemes:自定义配色方案的名字和 16 个色值(上面省略了 bright 系列 8 个);defaultProfile:启动 WT 时默认打开哪个 shell(我默认开 Ubuntu)。
cursorShape: "bar" 是把光标从默认的块状改成竖线状,纯个人喜好。
4. 第二步:scoop——Windows 侧的包管理器
包管理器(package manager):一条命令装/卸/升级软件的工具,免去找官网、点下一步的流程。Linux 的 apt、Node 的 npm 都是同类。
scoop:Windows 下的命令行包管理器,官网 https://scoop.sh ,专门管理这类绿色 CLI 工具,全部装在用户目录下,不需要管理员权限。
安装(在 PowerShell 里执行,官方文档 https://scoop.sh ):
> Set-ExecutionPolicy -ExecutionPolicy RemoteSigned -Scope CurrentUser
> Invoke-RestMethod -useb get.scoop.sh | Invoke-Expression
第一行是允许运行本地脚本(scoop 的安装脚本是本地下载的脚本),第二行下载并执行安装脚本。
之后所有工具都是 scoop install 名字 一条命令。我这台机器 scoop list 的真实结果(节选):
Name           Version    Source
----           ------     ------
7zip           26.02      main
bat            0.26.1     main
bottom         0.14.9     main
clink          1.9.34     main
delta          0.19.2     main
eza            0.23.5     main
fzf            0.74.3     main
jq             1.8.2      main
oh-my-posh     31.3.0     main
ripgrep        15.2.0     main
zoxide         0.10.0     main
5. PowerShell 美化
5.1 Oh My Posh:提示符引擎
提示符(prompt):每行命令开头那段 PS C:\Users\xxx> 。美化它 = 让它显示 git 分支、上条命令耗时、Python 环境、彩色分段等。
Oh My Posh:跨 shell 的提示符渲染引擎,官网 https://ohmyposh.dev ,一个 JSON 配置文件描述提示符长什么样,PowerShell/cmd/bash/zsh/fish 通用。
安装 + 主题:
> scoop install oh-my-posh装完自带一百多个现成主题,在 %USERPROFILE%\scoop\apps\oh-my-posh\current\themes\ 目录下,全部预览:https://ohmyposh.dev/docs/themes
我选的是 powerlevel10k_rainbow(彩虹分段风格,和 Ubuntu 侧 p10k 呼应)。
5.2 配置文件(profile)——PowerShell 的 “开机自启脚本”
profile:PowerShell 每次启动时自动执行一遍的脚本文件,别名、函数、模块导入都写在这里。路径用 $PROFILE 变量查看:
> $PROFILE
C:\Users\chengongyi\Documents\WindowsPowerShell\Microsoft.PowerShell_profile.ps1
我的完整配置(真实文件,逐段解释在下面):
# ---- 提示符主题 ----
# 换主题只改下面一行;全部主题在 ~\scoop\apps\oh-my-posh\current\themes\
$theme = "$env:USERPROFILE\scoop\apps\oh-my-posh\current\themes\powerlevel10k_rainbow.omp.json"
if (Get-Command oh-my-posh -ErrorAction SilentlyContinue) {
    oh-my-posh init pwsh --config $theme | Invoke-Expression
}

# ---- ls 彩色图标 ----
Import-Module Terminal-Icons -ErrorAction SilentlyContinue

# ---- 历史预测 + Tab 菜单补全(需 PSReadLine >= 2.1)----
if ((Get-Module PSReadLine) -and (Get-Module PSReadLine).Version -ge [version]'2.1.0' -and -not [Console]::IsOutputRedirected) {
    Set-PSReadLineOption -PredictionSource History -PredictionViewStyle ListView
    Set-PSReadLineOption -HistoryNoDuplicates -MaximumHistoryCount 4096
    Set-PSReadLineKeyHandler -Key Tab -Function MenuComplete
    Set-PSReadLineKeyHandler -Key UpArrow -Function HistorySearchBackward
    Set-PSReadLineKeyHandler -Key DownArrow -Function HistorySearchForward
}

# ---- zoxide:z 命令智能跳目录 ----
if (Get-Command zoxide -ErrorAction SilentlyContinue) {
    Invoke-Expression (& { (zoxide init powershell | Out-String) })
}
(文件里还有一段 proxy-on/proxy-off 系统代理开关函数,属于抓包工作流的私人工具,与美化无关,不展开。)
逐段解释:
提示符段:oh-my-posh init pwsh --config 主题文件 | Invoke-Expression 是官方接入方式(https://ohmyposh.dev/docs/installation/prompt),它输出一段初始化脚本再立刻执行。外面包一层 if (Get-Command ...) 是防御:万一 oh-my-posh 没装,PowerShell 启动也不报错。
Terminal-Icons 段:https://github.com/devblackops/Terminal-Icons ,一个 PowerShell 模块,给 Get-ChildItem(别名 ls / dir)的输出按文件类型上色并加 Nerd Font 图标。安装:Install-Module Terminal-Icons(本机版本 0.11.0)。效果见上面第三张截图:文件夹、压缩包、可执行文件各有图标和颜色。
PSReadLine 段:PSReadLine 是 PowerShell 的命令行编辑模块(官网 https://github.com/PowerShell/PSReadLine ),Windows 10 自带 2.0,我升到了 2.4.5。四个设置的效果:
-PredictionSource History:根据历史命令实时猜你想输入什么,灰字显示补全建议,按 → 采纳;-PredictionViewStyle ListView:把建议以列表形式弹出来(本机 2.4.5 版本可用);-Key Tab -Function MenuComplete:按 Tab 弹出候选菜单而不是单调补全;UpArrow/DownArrow -HistorySearch*:按上箭头按 “已输入的前缀” 筛历史,而不是整条翻。
-not [Console]::IsOutputRedirected 这个条件的意思是:输出被重定向(比如管道、CI 环境)时不启用,避免干扰脚本。
zoxide 段:zoxide(https://github.com/ajeetdsouza/zoxide )记录你 cd 过的每个目录并按访问频率排序,之后 z 关键字 一步跳转。zoxide init powershell 是官方的 shell 接入命令。真实数据库内容(zoxide query -l 列出全部记录):
F:\code\Net\Main\jzfz.platform.specialproject\JZFZ.Platform.SpecialProject.Webapi
C:\Users\chengongyi\scoop
F:\code\Java\boss-admin
之后在 PowerShell 里 z boss 直达 F:\code\Java\boss-admin,不用一层层 cd。
5.3 效果
见第三张截图:彩色分段提示符(路径段、git 段)、Get-ChildItem 的图标输出。
6. cmd 美化:Clink 给 30 岁的 cmd 装外挂
cmd.exe 是 1990 年代的程序,没有插件机制。Clink(https://chrisant996.github.io/clink )做的事是把自己 “注入” 到 cmd 进程里,给 cmd 补上:持久化历史(Ctrl+R 搜索)、语法高亮、自动补全、Lua 脚本扩展。
> clink --version
1.9.34.4e8ae4
安装:
> scoop install clinkscoop 装完会自动执行 clink autorun install——往注册表写一条 “启动 cmd 时先加载 clink” 的钩子。验证:
> clink autorun show
Current AutoRun values
  Current user:
native : "C:\Users\chengongyi\scoop\apps\clink\current\clink.bat" inject --autorun(autorun 是 Windows 的机制:cmd 启动时自动运行注册表里指定的命令;Clink 用它来完成注入。)
6.1 让 cmd 用上 Oh My Posh 提示符
Clink 的扩展机制是 Lua 脚本,放在 %LOCALAPPDATA%\clink\ 目录。我的 oh-my-posh.lua(真实文件):
-- oh-my-posh 提示符桥接(cmd.exe via Clink)
-- 换主题: 只改下面 _config 的文件名
local _config = "C:\\Users\\chengongyi\\scoop\\apps\\oh-my-posh\\current\\themes\\powerlevel10k_rainbow.omp.json"

local omp_prompt = clink.promptfilter(1)

function omp_prompt:filter(prompt)
    local pipe = io.popen('oh-my-posh print primary --config "' .. _config .. '" --shell cmd')
    local text = pipe:read("*a")
    pipe:close()
    if not text or text == "" then
        return prompt
    end
    return text:gsub("[\r\n]+$", "")
end
解释:Clink 每次画提示符前会调用注册的 promptfilter(提示符过滤器);这个过滤器调用 oh-my-posh print primary(渲染一次提示符并输出)拿到字符串,替换掉 cmd 原生提示符。主题和 PowerShell 用的是同一个文件,所以两边长相一致。
同目录还有个 zoxide.lua(Clink 官方文档给的 zoxide 接入脚本,https://github.com/ajeetdsouza/zoxide#cmd ,让 cmd 里也能用 z 跳目录)。
6.2 效果
见第四张截图:cmd 标签页里跑着彩虹提示符 + eza 文件列表。30 岁的 cmd 焕发第二春。
7. Ubuntu(WSL)美化
7.1 换 shell:bash → zsh + oh-my-zsh + powerlevel10k
zsh:功能比 bash 强得多的 shell(更强的补全、更强的脚本能力),macOS 的默认 shell。oh-my-zsh(https://ohmyz.sh )是 zsh 的配置框架,一行命令装好 300+ 插件和主题的管理结构。powerlevel10k(下称 p10k,https://github.com/romkatv/powerlevel10k )是 zsh 里最流行的提示符主题,快、信息密度高、自带配置向导。
安装顺序(Ubuntu 22.04,官方文档命令):
# 1. zsh 本体
sudo apt install zsh
# 2. 把默认 shell 换成 zsh
chsh -s $(which zsh)
# 3. oh-my-zsh(最后的空参数表示装完不自动进 zsh)
sh -c "$(curl -fsSL https://raw.githubusercontent.com/ohmyzsh/ohmyzsh/master/tools/install.sh)" ""
# 4. p10k 主题,克隆进 oh-my-zsh 的自定义主题目录
git clone --depth=1 https://github.com/romkatv/powerlevel10k.git \
  ${ZSH_CUSTOM:-$HOME/.oh-my-zsh/custom}/themes/powerlevel10k
# 5. 两个必备插件
git clone --depth=1 https://github.com/zsh-users/zsh-autosuggestions \
  ${ZSH_CUSTOM:-$HOME/.oh-my-zsh/custom}/plugins/zsh-autosuggestions
git clone --depth=1 https://github.com/zsh-users/zsh-syntax-highlighting \
  ${ZSH_CUSTOM:-$HOME/.oh-my-zsh/custom}/plugins/zsh-syntax-highlighting
第一次进 zsh 时 p10k 会自动启动配置向导 p10k configure,一问一答选样式(是否双行提示符、要不要图标、简洁还是华丽),最后生成 ~/.p10k.zsh。
两个插件的效果:
- zsh-autosuggestions:根据历史把整条命令用灰色补全出来,按 → 采纳(就是 fish shell 那个体验);
- zsh-syntax-highlighting:命令存在显示绿色、拼错显示红色,实时反馈。
7.2 我的 .zshrc(真实文件 + 逐段解释)
# Powerlevel10k instant prompt
if [[ -r "${XDG_CACHE_HOME:-$HOME/.cache}/p10k-instant-prompt-${(%):-%n}.zsh" ]]; then
  source "${XDG_CACHE_HOME:-$HOME/.cache}/p10k-instant-prompt-${(%):-%n}.zsh"
fi

export LANG=en_US.UTF-8
export EDITOR=vim

# --- oh-my-zsh ---
export ZSH="$HOME/.oh-my-zsh"
ZSH_THEME="powerlevel10k/powerlevel10k"
plugins=(git zsh-autosuggestions zsh-syntax-highlighting)
source $ZSH/oh-my-zsh.sh

# --- pretty tools (after omz so its lib doesn't override; alias only if installed) ---
# eza 0.23.5 has a bug: bare `eza` (no path arg) silently prints nothing.
# Wrap it with functions that default to "." when no argument is given.
if command -v eza >/dev/null; then
  ls() { eza --icons=always "${@:-.}"; }
  ll() { eza -l --icons=always --git "${@:-.}"; }
  la() { eza -la --icons=always --git "${@:-.}"; }
fi
command -v batcat >/dev/null && alias cat='batcat --paging=never'
command -v fastfetch >/dev/null && alias fetch='fastfetch'

# --- history ---
HISTSIZE=10000
SAVEHIST=10000
setopt SHARE_HISTORY HIST_IGNORE_DUPS

# To customize prompt, run: p10k configure
[[ ! -f ~/.p10k.zsh ]] || source ~/.p10k.zsh- instant prompt 段(开头那个 if):p10k 的提速黑科技——把上次的提示符先画出来,后台再慢慢加载配置,消除 zsh 启动卡顿;
- ZSH_THEME:主题指定为 p10k(oh-my-zsh 的主题命名是
目录名/主题名); - plugins=():启用 git 缩写(
gst=git status 之类)、自动建议、语法高亮三个插件; - eza/bat/fastfetch 段:把老命令换成现代替代品(下一小节详说),全部用
command -v xxx先探测再启用,工具没装也不报错; - history 段:
SHARE_HISTORY让多个终端窗口共享历史,HIST_IGNORE_DUPS连续重复命令只记一次。
7.3 三个现代替代命令
eza(https://github.com/eza-community/eza ):ls 的现代替代——颜色更丰富、文件图标、git 状态集成(哪些文件有改动一眼可见)。Ubuntu 22.04 的 apt 源里没有,我从 GitHub Releases 下载的二进制放进 /usr/local/bin/eza(官方安装文档 https://github.com/eza-community/eza/blob/main/INSTALL.md 有 deb 包、cargo 等多种方式),本机版本:
$ eza --version
eza - A modern, maintained replacement for ls
v0.23.5 [+git]bat(https://github.com/sharkdp/bat ):cat 的现代替代——语法高亮、行号、git 修改标记。Ubuntu 直接 sudo apt install bat,注意 Ubuntu 里它的命令名叫 batcat(因为和另一个老包冲突),所以我别名成 cat:
$ batcat --version
bat 0.19.0fastfetch(https://github.com/fastfetch-cli/fastfetch ):neofetch 的快速继任者,终端里打印系统信息 + 发行版 logo 的 ASCII 艺术。打开终端先来一发,仪式感拉满。Ubuntu 22.04 从 GitHub Releases 装 deb 包(https://github.com/fastfetch-cli/fastfetch/releases ),本机版本 2.68.1。真实输出(fetch 别名):
                             ....              root@pc3507
              .',:clooo:  .:looooo:.           -----------
           .;looooooooc  .oooooooooo'          OS: Ubuntu 22.04.4 LTS (Jammy Jellyfish) x86_64
        .;looooool:,''.  :ooooooooooc          Host: Windows Subsystem for Linux - Ubuntu-22.04 (2.6.3.0)
       ;looool;.         'oooooooooo,          Kernel: Linux 6.6.87.2-microsoft-standard-WSL2
      ;clool'             .cooooooc.  ,,       Uptime: 1 hour, 22 mins
         ...                ......  .:oo,      Packages: 527 (dpkg)
  .;clol:,.                        .loooo'     Shell: zsh 5.8.1
 :ooooooooo,                        'ooool     Window Manager: WSLg 1.0.71 (Wayland)
'ooooooooooo.                        loooo.    Terminal: Windows Terminal
'ooooooooool                         coooo.    CPU: Intel(R) Core(TM) i5-8500 (6) @ 3.00 GHz
 ,loooooooc.                        .loooo.    GPU: NVIDIA GeForce GTX 1050 @ 1.91 GHz (1.92 GiB)
   .,;;;'.                          ;ooooc     Memory: 1.33 GiB / 7.76 GiB (17%)
       ...                         ,ooool.     Swap: 0 B / 4.00 GiB (0%)
    .cooooc.              ..',,'.  .cooo.      Disk (/): 10.31 GiB / 1006.85 GiB (1%) - ext4
      ;ooooo:.           ;oooooooc.  :l.       Disk (/mnt/c): 205.09 GiB / 232.35 GiB (88%) - 9p
(注意它甚至正确识别出宿主机是 Windows Terminal、GPU 是 GTX 1050——WSL2 把这些信息透传给了 Linux 侧。)
7.4 踩坑实录:eza 0.23.5 裸调用静默无输出
配置好之后我发现 ls(已被函数包装到 eza)时而输出空白。逐层排查(命令 → 输出 → 解释):
命令:
$ cd /etc && eza > /tmp/o1 2>/tmp/e1; echo "out=$(wc -c < /tmp/o1) err=$(wc -c < /tmp/e1)"输出:
out=0 err=0解释:eza 不带路径参数运行时,stdout 0 字节、stderr 0 字节、退出码 0——不报错、不出声、不干活。而带显式路径完全正常:
命令:
$ eza /etc | head -3输出:
adduser.conf
alternatives
apache2
解释:问题只出在 “无参数时解析当前目录” 这条路径上。Windows 侧 scoop 装的同版本 0.23.5 一样复现,且 GitHub 上 v0.23.5 就是当前最新 release(2026-07-09 发布),还没有修复版本。临时解法就是我 .zshrc 里那三个函数:无参数时自动补 .:
ls() { eza --icons=always "${@:-.}"; } # ${@:-.} 意思是:没有参数就展开成 "."这样 ls 等价 eza --icons=always .,ls /etc 等价 eza --icons=always /etc,两边都正常。等上游修复后可以把函数换回普通别名。
8. 工具层:scoop 里那堆 CLI 各是干什么的
| 工具 | 替代谁 | 一句话 | 官网 |
|---|---|---|---|
| eza | ls | 彩色+图标+git 状态的文件列表 | https://github.com/eza-community/eza |
| bat | cat | 语法高亮+行号的文件查看器 | https://github.com/sharkdp/bat |
| fzf | — | 模糊搜索器,history | fzf 之类任意列表交互式过滤 | https://github.com/junegunn/fzf |
| ripgrep (rg) | grep | 极快的全文搜索,自动跳过 .gitignore | https://github.com/BurntSushi/ripgrep |
| delta | git diff | 给 git diff/log 上色、并排对比、行号 | https://github.com/dandavison/delta |
| bottom (btm) | top/任务管理器 | 跨平台图形化资源监视器 | https://github.com/aristocratos/bottom |
| zoxide (z) | cd | 按频率智能跳目录 | https://github.com/ajeetdsouza/zoxide |
| jq | — | 命令行 JSON 处理器 | https://github.com/jqlang/jq |
| 7zip | winrar | 万能压缩解压 | https://www.7-zip.org |
其中 delta 接管 git 的 diff 显示,配置在 ~/.gitconfig(真实摘录):
> git config --global --list | findstr delta
core.pager=delta
interactive.difffilter=delta --color-only
delta.navigate=true
delta.line-numbers=true
core.pager=delta 的意思:git 需要分页显示 diff 时改用 delta 程序;line-numbers=true 加行号;navigate=true 按 n/N 在 diff 的文件间跳转。
9. 小白照抄清单(按顺序)
# ===== Windows 侧(PowerShell 里执行) =====
# 1. Windows Terminal:商店搜 Windows Terminal,或
winget install --id Microsoft.WindowsTerminal
# 2. 字体:https://github.com/romkatv/powerlevel10k#fonts 下载 MesloLGS NF,右键“为当前用户安装”
# 3. scoop
Set-ExecutionPolicy -ExecutionPolicy RemoteSigned -Scope CurrentUser
Invoke-RestMethod -useb get.scoop.sh | Invoke-Expression
# 4. 工具全家桶
scoop install oh-my-posh clink zoxide fzf eza bat ripgrep delta bottom jq 7zip
# 5. PowerShell 模块
Install-Module Terminal-Icons
Install-Module PSReadLine -Force    # 5.1 自带 2.0,升到 2.1+ 才有历史预测
# 6. 把第 5 节的 profile 内容写进 $PROFILE 指向的文件
notepad $PROFILE
# 7. cmd 侧:把第 6 节的 oh-my-posh.lua / zoxide.lua 放进 %LOCALAPPDATA%\clink\
# ===== Ubuntu 侧(WSL 里执行) =====
sudo apt update && sudo apt install zsh bat
chsh -s $(which zsh)
sh -c "$(curl -fsSL https://raw.githubusercontent.com/ohmyzsh/ohmyzsh/master/tools/install.sh)" ""
git clone --depth=1 https://github.com/romkatv/powerlevel10k.git ${ZSH_CUSTOM:-$HOME/.oh-my-zsh/custom}/themes/powerlevel10k
git clone --depth=1 https://github.com/zsh-users/zsh-autosuggestions ${ZSH_CUSTOM:-$HOME/.oh-my-zsh/custom}/plugins/zsh-autosuggestions
git clone --depth=1 https://github.com/zsh-users/zsh-syntax-highlighting ${ZSH_CUSTOM:-$HOME/.oh-my-zsh/custom}/plugins/zsh-syntax-highlighting
# eza / fastfetch 走 GitHub Releases 的 deb 或二进制(见 7.3 节)
# 把 7.2 节的 .zshrc 内容写进 ~/.zshrc,重开终端跑 p10k configure10. 遗留的坑(记录备查)
- eza 0.23.5 裸调用无输出:见 7.4,函数包装绕过;
- 图标显示成方块:九成是终端字体没换成 Nerd Font(settings.json 的
font.face); wt命令行里的分号:wt new-tab ... -- shell -c "a; b"里的;会被 WT 当成自己的子命令分隔符拆开,命令莫名变味——shell 命令里用&&连接就没这个问题;- 便携版单实例:便携版 Windows Terminal 的多个窗口由同一个进程管理,用命令行往里塞新窗口偶发失灵(尤其手动关过窗口之后),重开 Terminal.exe 进程即可恢复。
全文的配置文件、版本号、命令输出都取自本机 2026-09-24 的真实状态,四个工具的 GitHub 仓库与官方文档链接都在文中。照着第 9 节的清单走,半小时能把三个 shell 全部拉到截图里的样子。